We put an unusual university on VKontakte
I want to tell you about a way in which you can change your university, which will be unique in its own way. Let's say you can, for example, put VIP instead of the regular MSU university. I think it’s not very clear, so I’ll show you with an example. This is what a typical university looks like:
This is what our non-standard university will look like
There are two ways to make a university yourself, which differ only in the degree of hemorrhage.
How to change the place of study in VK? An easy way to change your university to an unusual one
The method is easy, but not as universal as the next one.
1.
We find a person with an unusual university, I provide you with a link to some dude: Click here2.
Next, open full information about the person and click on his university
3.
You will see a list of people with the same university
4.
Now we need to change our full version of VK to mobile; to do this, add “m.” in front of vk.com in the address bar to get m.vk.com/..
5.
You should have seen that it looks like you are from this UNIVERSITY. Click “Yes, save.” If this does not appear, then go to » My page -> ed. -> Education -> higher education -> change to “not selected”
The hemorrhoidal way to change universities
Here everything will be done by changing the source code of the page. I have already written about this in some detail, so no difficulties should arise.
Let's get started:
1.
Go to the higher education editing page (My page - edit - education - higher education)2.
We choose Russia - Moscow - Moscow State University
3.
Now that we have selected MSU, right-click on it and select “View element code” and look for value = 2
4.
Now the displayed university will depend on changes in value.
Right-click on the line where it says value = “2” and select from the list “Edit as Html” The number 2 must be replaced with the value and click save. Digital values and their display: Becoming VIP on VKontakte:
208946 - VIP 359988 - $ VIP $ 405026 - ?VIP?
All other codes can be viewed on the website: Click here
declive.ru
How to set your VKontakte “place of work” group
The easiest way to open an online school: starting an online school through VKontakte
If you have a group or public VKontakte page and you want to develop and expand it, then step-by-step instructions will help you with this.
If there is no group, you could help promote the most interesting and favorite VKontakte group. The point is to put the VK group in the “Place of Work” profile settings item.
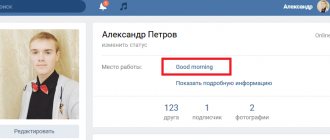
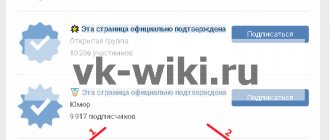
Let's see what this looks like in practice. We go to the “My Friends” menu list and, scrolling through the list of our friends, we see that in some profiles the classic “place of work” has been replaced with an active link.
This link just points to a community or public page. You can see an example below:
How to set your VKontakte group as a “place of work”? Yes, very simple. All you need to do is set a couple of simple settings and save the results. After this, you will immediately appear in your friends’ lists along with a link to your favorite community (how to create your own group).
Let's look at another example and immediately get down to step-by-step instructions on how to put a link to a VK group instead of work
Step #2
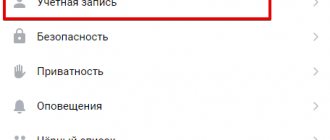
Let's move on to editing your personal page. To do this, click on the “Edit” submenu, which is located under the “My Page” item. Here's how it is in the screenshot:
Step #3
Next we will be interested in the “Career” menu item. Click on it and immediately go to the first setting item “Place of Work”.
Step #4
In the “Place of Work” field (as soon as we place the cursor here), a list of our communities (groups and public pages in which we participate) is automatically displayed. We can simply find the group we need in this list. If not, then you can insert a link to any other VK group into this field.
After establishing the community that we want to display in the profile, be sure to save the settings with the “Save” button.
Step #5
In principle, we have already entered all the necessary settings, and now a direct link to the VK group will be displayed in your profile in the “Place of Work” item. Here's a simple step-by-step instruction. But let's go a little deeper into the settings.
If you carefully examined the settings of the “Career” page, you noticed the option “Add another place of work”, and you can indeed indicate several career stages of your own life, BUT!!! The direct link in the profile will be displayed only to the last place of work.
This technique seems logical, since it reflects only the real state of affairs of a social network participant.
In reality, this means that the most important VC group should be added last (if there are several such groups). In our reduced profile, only the last link will be shown!
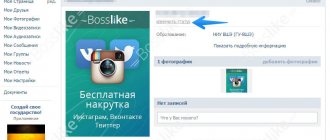
For those who don’t know, full information about places of work is indicated on the profile page in “Detailed information”. This is shown in the screenshot:
Here, if you look closely, there is a direct link to editing this information block. Those. To subsequently change information about your place of work (to change the VK group), simply click here on the “Edit” option.
We indicate our address
Go to your page and click on the "Edit" button.
Now go to the “Contacts” tab, and click on the “Specify location” link.
A form will open in which you need to indicate your home address. Select your country, city, etc. here. Also give a name to this point on the map. When you fill everything out, click the “Save” button.
Literally any social network, including VKontakte, today provides a wide range of different opportunities, including those created specifically for making new acquaintances. One of these kinds of details is the installation of the city of residence and birth, which we will discuss in detail later.
We immediately draw your attention to the fact that whatever the city you specify, first of all you will have to set additional privacy settings, providing access to the profile to certain users. However, some data, even excluding this feature, will still be available by default.
In addition to the above, like any similar site, VK provides new users with special tips that allow them to easily set all the desired settings. You should not ignore these types of notifications if you are new to the general functionality of this resource.
Full version
Today, not counting additional sections, which we will mention later, you can set a city on a VKontakte page using two different methods. However, both methods are not an alternative to each other.
The first of the possible options for setting your place of residence gives you, as a user of this social network, the opportunity to set your hometown. This block of editing parameters should be regarded only as an addition, since it often does not claim a high level of reliability.
- Go to the VKontakte main page using the button "My page"
and under your profile photo click on the button
"Edit"
.Alternatively, you can expand the main menu by clicking on the icon in the upper corner of the working window and in the same way switch to the main page of the “Edit”
.
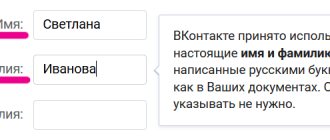
- Now you will find yourself on the “Basic”
in the section with the ability to change personal data. - Scroll down the options page to the Hometown
. - Change the contents of the specified column according to your requirements.
- You can change the contents of this field without any restrictions, indicating not only existing cities and reliable data, but also fictitious settlements.
- Before leaving the editing options section in question, you must apply the settings using the “Save”
at the bottom of the page. - To make sure the information you entered is correct, as well as to check the display, go to your profile wall.
- On the right side of the page, expand the “Show detailed information”
. - In the first section “Basic information”
opposite the item
“Hometown”
you will see what you specified earlier.
The field can be left empty if desired.
It is worth noting that if someone uses the data you provide as a search query on the VKontakte website, your page will be displayed in the results. At the same time, even privacy settings that cover your personal profile as much as possible will not protect you from this phenomenon.
In the future, be careful when entering real data without additional protection from privacy settings!
The second and much more significant method of indicating a city on a VK page is to use the “Contacts”
. Moreover, unlike the previously considered option, the place of residence is significantly limited by actually existing settlements.
- Open the "Edit"
. - Using the menu on the right side of the working window, go to the "Contacts"
. - At the top of the page that opens, in the “Country”
, indicate the name of the state you need. - As soon as you indicate any territory, the column “City”
. - From the automatically generated list, you need to select a locality according to your personal requirements.
- If the area you need was not added to the initial list, scroll to the bottom and select "Other"
. - By doing this, the contents of the row will change to “Not Selected”
and will be available for manual modification. - Fill out the field yourself, guided by the name of the desired locality.
- Directly during the typing process, you will be presented with automatic prompts containing both the name of the city and detailed information about the region.
- To finish, choose a location that suits your requirements.
- You do not have to enter the full name of the territory, since the automatic selection system works more than perfectly.
- In addition to the above, you can repeat the steps in the other two sections:
Each country has a strictly limited range of areas.
- Unlike the “Contacts”
, these settings predispose to the possibility of specifying several different places at once, having different countries and, accordingly, cities. - After you have specified all the data directly related to the cities, apply the parameters using the “Save”
at the bottom of the active page. - You can easily check exactly what the set parameters look like by opening the profile questionnaire.
- The city you specified in the "Contacts"
will be displayed immediately below your date of birth. - All other data, as in the first case, will be presented within the “Detailed information”
.
This must be done separately in each section!
None of the sections discussed are required to be completed. Thus, the need to indicate the locality is limited solely by your personal desires.
mobile version
A fairly large number of users of the social network in question prefer to use the official mobile application, which has slightly different functionality compared to the full version of the site. That is why the procedure for changing city settings on Android is worthy of a separate section.
Such settings are fixed on VK servers, and not for a specific device.
Please note that the mobile version of VK provides the ability to change the city only within the “Contacts”
. If you need to correct data in other blocks of the site, you should use the full-fledged VK site from a computer.
Mobile app
- After launching the application, open the main menu using the corresponding icon on the toolbar.
- Now at the top of the screen, find the “Go to profile”
and click on it. - On the page that opens, you need to use the “Edit”
. - Scroll through the specified section to the “City”
. - In the first column, similar to the full version of the site, you need to indicate the country you need.
- Next, click on the “Select a city”
. - Through the context window that opens, you can select a locality from the list of the most popular queries.
- If the required territory is not available, manually enter the name of the required city or region in the “Select city”
. - After specifying the name, click on the desired area from the automatically generated list.
- As in the case of the full version, the entered queries can be significantly reduced.
- Once the selection is complete, the window will automatically close, and
a new settlement will be entered “Select a city” - Before leaving the section, be sure to apply the new settings using the special button in the upper right corner of the screen.
- No additional confirmation is required, as a result of which you can immediately see the results of the adjustments made.
There is a button under your name.
If the area is missing, you may have made a mistake somewhere or, in the unlikely event, the location you want has not been added to the database.
The described nuances are the only possible way to change the territorial profile settings from mobile devices. However, you should also not lose sight of another type of this social network, in the form of a lightweight version of the site.
Browser version of the site
- Using a browser, open the resource using the link we provided.
- Expand the main menu using the button in the upper left corner of the screen.
- Click on your account name to open the main page.
- Next, use the “Full information”
to open the full profile. - Above the “Basic information”
, click on the
“Edit page”
. - Scroll the window that opens to the “Contacts”
. - Based on what we said above, first change the contents of the “Country”
and then indicate
“City”
. - The main feature here is the fact that the territory is selected on separately opened pages.
- To search for a locality outside the standard list, a special field “Select a city”
, followed by highlighting the desired area. - After specifying the required information, use the “Save”
. - “Editing”
section and returning to the home page, the settlement will be automatically updated.
Within the framework of this article, we examined in detail literally all existing methods of changing the city on the VK page. Therefore, we hope that you will be able to avoid possible complications.
We continue to understand the settings and appearance of our page on the VKontakte social network (see). Now we will learn how to add data about the country and our city of residence to our profile.