06.05.2019
After the latest global updates to the VKontakte social network, many interesting opportunities have appeared with which you can beautifully decorate your personal page. One of these features is photo status
. Photo status is 5, which are placed in the section for displaying the latest downloaded photos; thanks to their location, they got their name “Photo Status”. This beauty looks like this:
As you can see, it looks beautiful, with the help of a status photo you can show your uniqueness or just show off to your friends. You've probably seen the VKontakte photo status from your friends and want to ask, “How to make a VKontakte photo status yourself?”
I’ll tell you everything in detail now.
How to make a photo status?
Pictures in status
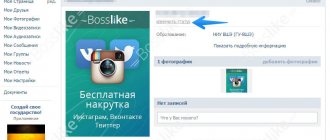
Go to applications, install it on your page, then this window should open in front of you.
In you can:
- View the most popular or new photo statuses.
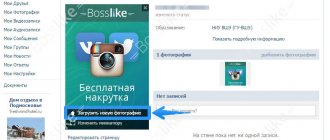
- When you click “Add a picture” you can create a photo status yourself.
- After selecting the status, click the “Apply” button, the photo status will be loaded onto your page in a couple of seconds.
It’s just a pity that you can’t download pictures for status photos from the app.
Photo status
The Photo Status application is very similar to status pictures, but has a very interesting feature. You can write your own text in the application, and then upload it to the photo status. To make it clearer, I present to your attention a picture.
We put a photo status on our page
To begin with, it’s worth clarifying what photostatus actually is. This saying word refers to the photo feed located on each user’s page under the main profile information.
If a photo status has not been set on your page, then the above-mentioned space, that is, a block of photos, will be occupied by ordinary pictures in the loading order. Sorting, in this case, occurs exclusively by date, but the order can be disrupted by independently deleting photos from this feed.
Under any circumstances, after installing a photo status on a page, you are required to delete new photos from your feed. Otherwise, the integrity of the established status will be violated.
There are many ways to set a status from photos to a page, but most of these methods come down to using similar applications. At the same time, of course, there are other options for setting the photo status, including manual.
Method 1: Using the app
There are several applications on the VKontakte social network, each of which was developed specifically to make it easier for users to set a status from photos. Each such addition is completely free and available to every owner of a VK.com profile.
Such applications provide two types of functionality:
- installation of a ready-made photo status from the database;
- creating a photo status from a user-supplied picture.
The database of each such application is very extensive, so you can easily find what is right for you. If you want to install a pre-prepared picture, you will need some additional steps.
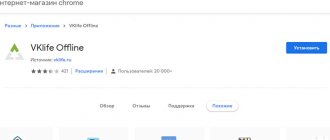
- Log in to the VKontakte website using your username and password and go to the “Games” section through the main menu.
On the page that opens, find the search bar “Search by games.”
After opening the add-on, check out the existing photo statuses. If necessary, use the search and sorting functionality by category.
If you are not satisfied with the statuses created by other people, you can create your own by clicking the “Create” button.
A window will appear in front of you with the ability to download and edit the image file. Click the “Select” button to upload a picture for the photo status you are creating.
The main condition for downloading a file is its size, which must be more than 397x97 pixels. It is advisable to select pictures in horizontal orientation to avoid problems with incorrect display.
After loading the image for the status, you can select a zone of the image that will be displayed on your page. The remaining parts will be trimmed.
Also pay attention to the item “Add to common directory” . If you check the box, your photo status will be added to the general catalog of user pictures. Otherwise, it is installed only on your wall.
When you're done selecting the area, click the "Load" button.
Next, you will be shown the final version of the status. Click on the “Install” button to save the photo status to your page.
Go to your VKontakte page to make sure the status from the pictures is correct.
The main advantage of this method is that you can turn your photo feed into an elegant solid image in a few clicks. The conditional and only disadvantage is the presence of advertising in almost every such application.
This method of installing a photo status on a VKontakte page is the most optimal for the average user. In addition, the application will not only install pictures in the feed in the correct order, but will also create a special album for itself. That is, downloaded pictures will not become a problem for all other photo albums.
Method 2: Manual installation
In this case, you will need much more action than in the previous method of setting a photo status. In addition, you will need a photo editor, such as Adobe Photoshop, and some skills in using it.
It is also worth clarifying that if you do not have experience working with photo editors, you can find ready-made pictures for a photo status on the Internet.
- Open Photoshop or any other editor convenient for you and select “Create” from the “File” menu.
In the document creation window, specify the following dimensions: width – 388; height – 97. Please note that the main unit of measurement should be “Pixels”.
Drag a pre-selected image file for your photo status into the editor's work area.
Use the Free Transform tool to scale the image and press Enter.
Next, you need to save this image in parts. To do this, use the “Rectangular Marquee” tool, setting the area dimensions to 97x97 pixels.
Right-click on the selected area and select “Copy to new layer.”
Do the same for each part of the image. The result should be four layers of the same size.
Upon completion of the above steps, you need to save each selection area into a separate file and upload them in the correct sequence to the VK page. We also do this strictly according to the instructions.
- Hold down the “CTRL” key and left-click on the preview of the first prepared layer.
Next, copy the layer using the keyboard shortcut “CTRL + C”.
Be sure to make sure that you are copying exactly the selected layer. Otherwise, there will be an error.
Create a new document through the "File" menu. Be sure to make sure that the resolution in the settings is 97x97 pixels.
In the window that opens, press the key combination “CTRL + V” to paste the previously copied area.
From the "File" menu, select "Save As...".
Go to any directory convenient for you, specify the file name and type “JPEG”, and click the “Save” button.
Repeat the same with the remaining parts of the original image. As a result, you should get four pictures that are continuations of each other.
- Go to your VKontakte page and go to the “Photos” section.
If you wish, you can create a new album, specifically for the photo status, by clicking the “Create Album” button.
Specify your preferred title and ensure that your privacy settings allow everyone to see the photo. Afterwards, click the “Create Album” button.
Once in the newly created photo album, click on the “Add Photos” button, select the file that is the last fragment of the original image and click “Open”.
All pictures must be loaded in reverse order, that is, from last to first.
Repeat all the described steps for each image file. As a result, pictures should appear in the album inverted from their original order.
Go to your page to make sure the photo status has been installed.
This method is the most time-consuming, especially if you have difficulties with photo editors.
If you have the opportunity to use VKontakte applications to set a photo status, then it is recommended to use them. It is recommended to manually design a page only if it is impossible to use add-ons. Thanks to high-quality applications, you are guaranteed not to have any difficulties. We wish you good luck!
Create a photo status with your own hands
For this we need:
- Select the picture you want to add to your photo status.
- In any graphic editor, cut and divide into 5 equal pieces.
- Upload the last picture to the contact first, and the first one at the end, in the following sequence: 5-4-3-2-1.
When I created a photo status three months ago, I did everything exactly like this. If you have any questions, I’m waiting for you in the comments.
If this article helped you or you liked it, don’t forget to like it
, this will help other users find it faster. And I can find out what interests you most in order to prepare and write even more interesting and useful articles! Best regards, Vyacheslav.
Innovations on VKontakte that were associated with displaying photographs on a person’s personal page made it possible to create statuses from photographs. Now every registered VKontakte user has an excellent opportunity to set a photo status for themselves. Photo status is a kind of 5 pictures that, when placed one after another, create one image.
Here are a few examples of different photo statuses that anyone can put on their VKontakte page:
Creating your own photo status is actually very simple.
To do this, you can use several applications that provide ready-made pictures or allow you to upload your own. If you find it difficult to understand these applications, we advise you to visit the site: Cool bitch statuses and use it to select the status you like and publish it on your page.
There are two applications, they are not much different from each other, but they provide the same opportunity:
Using these wonderful applications, you can also send any photo status that you like to your friend.
How to make a photo status for a contact yourself
If you don't like all the images provided by the application, you can make your own photo status.
Upload photo status yourself:
The easiest way to do this is using the same applications for Photo status in contact. All you need is to click on the “Create it yourself”
or
“Add a picture”
, wait until the image is loaded and select the part of the picture that you would like to see in your status.
You can add pictures both from your own albums in Contact and from your computer. You can also create your own photo statuses consisting of graphic text.
To do this, you need to select the “Create your own text” section and enter your phrase in the provided field. In this case, you can choose the background color, text and font size.
Having created your photo status, you will find that a new album has been automatically created in your albums, which contains the 5 pictures that are in your status. The logic of all this is very simple: your status contains exactly the five photos that were added last. Therefore, if you want to create a photo status without applications yourself
, you can do this according to the following scheme:
1). Select the image you want to see in your photo status.
2). Go to Photoshop or any other graphic editor that allows you to crop pictures.
3). Split the image into five equal parts and save as separate files in jpeg format.
4). Upload these 5 photos to a separate album in contact in such a sequence that the last part of the picture is uploaded first.
GD Star Rating
a WordPress rating system
Take a photo status on VKontakte, 3.8 out of 5 based on 8 ratings
Good day to everyone, my dear friends and readers of my blog. Have you ever noticed that many people have 4 photos on their VKontakte page that form one whole, that is, the so-called photo status? Please tell me, do you like this kind of performance? The fact is that I began to notice that many people ask for a photo status.
Yes, you can tinker with Photoshop, cut the photos into four equal squares, fit them as expected, save them and post them manually in an album. But of course, this is all too dreary, especially since there are ways to make a photo status in VK with a couple of simple movements. But if you suddenly need instructions on Photoshop, then write in the comments, and I will write a detailed article especially for you.
How to set a VKontakte photo status
Photo status is usually called a feed of photos that is located on each user’s page under the block with basic information. By default, photos that you previously uploaded to the social network are located there. They are sorted in download order, but you can remove one, several, or all photos from there. In the latter case, the block will disappear. It is worth mentioning that when you delete photos from this block, they remain on your page and can be viewed by any user; they simply disappear from the block.
Most often, users simply turn off this block or do not pay attention to it. However, it happens that they make a photo status out of it, uploading several thematic photos at the same time so that they together form a whole picture.
To simplify the procedure for installing photos, you can use special applications that are quite similar in their functionality and algorithm of actions. You can also set a photo status on VKontakte manually, however, this will take a lot of time. Below we will look at both options.
Option 1: Using a special application
The social network itself has several web applications built in from third-party developers that allow you to quickly customize the appearance of your profile to certain parameters, including setting a photo status. Most of these solutions are available completely free of charge and for every social network profile owner.
In total, web applications offer two options for setting a photo status:
You can also find applications where both scenarios are available. Thanks to the extensive database, you can easily install exactly what suits you best. At the same time, no one forbids you to put your image as a photo status.
So, let's look at, as an example, how to use one of the web applications for setting photos to status on VKontakte:
This way you can set almost any photo status in your VKontakte profile without any hassles. However, such applications mostly come with advertising, which can interfere with the interaction.
Among the additional features, it is also worth noting that the web application will create a separate album where it will place photos from your photo status. This is very convenient, since the photos will not be mixed with your personal ones, which will not create problems if the need arises to delete them.
We have a detailed article on our website about how to delete photos on VKontakte. We recommend that you familiarize yourself with it.
Option 2: Manual installation
This method involves more actions, as well as the presence of skills in working with some photo editor, for example, Adobe Photoshop. Do not be intimidated by this name, since the most basic skills in working with the program are required.
There is also the option of searching the Internet for photos that can be used as a photo status, although finding them can sometimes be difficult, especially when it comes to ready-made templates.
So, let's look at how to create a photo status in Photoshop and upload it to your VKontakte page:
Now we are faced with the task of saving the resulting “cuts” as separate images and uploading them in the correct sequence to your VKontakte page.
Photostatus
And the first service that we will touch on will be one very good website, which has the address fotostatus.me. This site is good because here you can choose ready-made photo statuses for any of the proposed topics, or create your own, for example from your own photo. As for the ready-made status, everything is clear here, but we’ll look at creating your own in more detail.
Luckily, you won’t need to visit the site anymore. Now you can do all such manipulations directly through the application. All the steps remain exactly the same, so you won’t have any problems.
Set status to poll
Additionally, you can add a survey to your entry; for this you need:
- Click on the rectangle under the main menu.
- In the long horizontal green menu there will be a button with a three stripes design. Let's press it.
- The window will expand slightly and three fields will appear:
- Your question;
- Possible answer;
- one more answer.
- Let's fill in these fields.
Advice! If there are more than two options, then you can leave or uncheck the box next to “the responder can choose only one answer” if you wish.
- Use the big green button to send the survey to your feed.
Now you can put anything you want into the status. The most important thing is that your status lifts the mood of you and your friends, and also shows your inner world (you can read about how to share a post with friends here). Good luck in the open spaces of Odnoklassniki.