When creating a public page on the popular VKontakte network, beginners often ask themselves the question of how to make an avatar and cover distinguishable from others, because proper design is already half the success. Many creators of VK groups turn to designers, especially if the topic of the created group relates to sales of a product. However, you can create both an avatar for VK and the cover yourself, using Paint or Photoshop.
The main thing is not to forget about a few simple rules:
- VKontakte supports JPG, PNG or GIF formats
- The best avatar sizes for a VKontakte group: 240 x 450.
- Dimensions covers: 1590 x 400.
As such, there are no specialized programs for creating avatars, but ordinary graphic editors can be used.
What elements should a VKontakte group avatar contain?
First of all, you need to display your company logo on your avatar. It is also advisable to briefly describe the scope of your business and the services you provide, since the space allocated for the logo is very limited. By the way, the maximum dimensions for a VKontakte group avatar are now 200 px in width and up to 500 px in height. Previously, it was possible to upload an avatar up to 700 pixels in height. If you want the VKontakte community to bring you clients, in the group avatar you must specify the main method of communication with your company, as a rule, this is a telephone. All these elements should be carefully placed in a certain composition, in the center of which there should be an attractive picture or collage. The picture should directly or indirectly reflect the essence of your business. Here, for example, is the logo I created for a community that sells Thermia heaters.
Also make sure that your logo can be used to create an attractive and readable thumbnail that will be displayed next to posts made on behalf of the group. Very often, calls to action are also placed on the avatar. Even more often, the avatar is made part of the overall picture along with the group menu, but I will devote a separate post to this. If you have minimal Photoshop skills, you can try to create a logo for your VKontakte community yourself, i.e. for free. By the way, you can try searching in this community for avatars for the VKontakte group in psd format. If you feel that for one reason or another you cannot create a community logo yourself, you can turn to a designer for help, whom you can try to find with the help of friends or on any freelancer exchange. I think that if you wish, you can find a designer who will agree to create an avatar for a VKontakte group at a price of 1000-1500 rubles. After you create an avatar, all you have to do is post it in your community. Just in case, I decided to briefly tell you about how to upload a logo to a VKontakte group. If you have not yet uploaded an avatar to your group, then on the right side of the community page you will have a camera icon with a link “Upload photo”. If you have already uploaded an avatar, then you need to hover your mouse over it, after which the “Upload a new photo” link will appear.
Next, you will be asked to upload a logo from your computer. After loading, you will see a window with your logo for the group and the selected area. Note that the highlighted area may not always be positioned correctly, so you may need to tug the corners a little or move the area itself so that your logo looks the way you want.
The same applies to the thumbnail, which you will be asked to edit in the next step. As I wrote earlier, when creating a logo, it is advisable to take care in advance to ensure that the thumbnail is attractive and readable.
Well, now I hope that you will not have any problems creating a logo for your VKontakte business page. In one of the following articles I will talk about how to properly create a menu for a VKontakte group. If you are interested in the topic of using the VKontakte social network for business, subscribe to blog updates in the form below.
We are accustomed to the fact that an avatar is the personification of a user on a social network, his “image”, which we kind of turn to if we want to write something to someone. Therefore, it is easy to guess how important the image that is installed on the profile screen plays.
True, not all people pay so much attention to the image of their page. Let's just say that all users (if we talk specifically about this issue) can be divided into two groups: those who set their photo to their avatar, and those who do not care about their profile image. They either leave the standard image or use some third-party image.
If we talk about groups, the situation here is different. If your group doesn't have an attractive, informative photo, most likely no one will even join it. Therefore, community administrators often ask the question: how to make an avatar for a VKontakte group? In this article we will look at several options for creating it, and also look at the features of photographs in groups.
Avatar and banner template
We have created a template that you can download from the link below. With it, it is possible to make a professional avatar yourself, but it will not be unique. While this doesn't mean it won't work, it may be worth considering individuality and reading our bonus offer.
Bonus
We offer a discount of 200 rubles to everyone who has read the article up to this paragraph and decides with us. When ordering, please include this code in the body of your email: HWC-DEZiGN-200
. The code is only valid for one of your orders.
The bulk of Internet resources for communication and interaction between users support avatars - images that make your profile recognizable. Usually it is customary to use your own photo as an avatar, but this statement is more applicable to social networks. On many sites, for example, forums and simply in the comments under copyrighted materials, users set themselves absolutely neutral pictures or pictures generated in a certain way.
In this article we will talk about how to create an avatar online from scratch, without importing an image from your computer.
You can also draw an avatar using a computer program - a photo editor or an appropriate tool created specifically for these purposes. However, you will find a wider variety of solutions for generating custom images online - in the form of online services. It is precisely such tools that we will consider further.
Method 1: Gallerix
This service allows you to create an avatar by choosing the facial features of an improvised identikit from dozens of available options. The tool provides the user with the opportunity to both independently adjust all the details of the image and generate an image automatically by randomly combining components.
Here's a simple way to create a hand-drawn avatar using the Gallerix service. As a result, you get a funny personalized picture for use on forums and other Internet resources.
Method 2: FaceYourManga
An incredibly flexible tool for generating cartoon avatars. The functionality of this service, in comparison with Gallerix, allows you to customize in even more detail all the elements of the created custom image.
As a result, a PNG image with a resolution of 180x180 will be saved in the memory of your PC.
Method 3: Portrait Illustration Maker
This service allows you to create simpler avatars than the solutions described above. However, many users will probably really like the style of the final pictures.
To start working with this tool, you do not need to register. Just follow the link above and start creating your avatar.
As a result, the finished image will be immediately saved in the memory of your computer.
Method 4: Pickaface
If you want to create the most personalized userpic, it is best to use the Pickaface service. The main advantage of this solution is that it is not necessary to “sculpt” everything yourself from scratch. You are offered more than 550 original projects and templates that can be easily changed as desired.
However, to use the functions of this tool, you will first have to register.
- To do this, select “Register”
. - Enter all the required data, check the signature checkbox "I have read and I accept the terms"
and press again
"Register"
.
Or simply use one of your social media accounts to log in. - After logging into your account, you will see a new menu item − "Create Avatar"
.Click on it to finally start creating your avatar in Pickaface.
- It will take some time for the editor's Flash interface to initialize.
Once the download is complete, select a language to use the service. Of the two proposed options, it is definitely better to choose the first one - English. - Select the desired gender of the character, after which you can proceed directly to the process of creating an avatar.
As in other similar services, you can customize the appearance of the drawn man down to the smallest detail. - When finished editing, click on the “Save”
. - You will be prompted to name your avatar.
Do this and click "Submit".
- Wait until the image is generated, and then click “View Avatar”
to go to the download page for the newly created userpic. - Now all you need to do to download the finished image is to click on the appropriate button under the image we created.
The result will definitely not disappoint you. Hand-drawn avatars created in Pickaface are always colorful and have a pleasant design style.
Method 5: SP-Studio
You can create an equally original cartoon userpic using the SP-Studio service. This tool allows you to create avatars in the style of the animated series "South Park"
.
There is no need to create an account on the site, and you can start working with the image directly from the main page.
Instructions
Put a picture on the web page that matches your essence. And you don't need to use any text. Your image should be clear without words. You can put your own photo on your Avatar. Choose a filming location with a beautiful landscape and take photos with a professional camera. It is advisable to have someone else photograph you, rather than yourself.
Sources:
- how to take a beautiful photo on ava
Feel free to follow the professionals and learn skills. The time will come - you will “grow” with useful skills and your own tricks. And if you liked some other person's photo, don't hesitate to repeat it. Perhaps you can do better. And if the photo doesn’t work out, you can always analyze what you did wrong.
Materialize your photos. Which means you should print them on larger formats too. You can immediately see minor flaws in a large photograph and work on the mistakes. And your friends, looking at the live photo with fresh eyes, will also be able to point out mistakes and evaluate the photo.
Participate in exhibitions and competitions more often. There is no point in burying your talent. And besides this, it’s useful for you to see other photographers. Strive to take photographs, because competition increases the desire for excellence. And don't be afraid of criticism. But look for it wisely. Show your still unprofessional photos around your level or a little higher. They will really help you with advice, while a professional photographer would limit himself to a couple of phrases like “not bad” or “will do for a start.”
And the last piece of advice: don’t get carried away with something that is too early for you to get carried away with. Many capable people immediately try to buy cameras, fashionable and other gadgets, but end up disappointed, having spent a lot of money and not getting the desired result. You need to be able to handle professional equipment. So take your time with it, improve yourself.
Video on the topic
Related article
Sources:
- How to learn to take beautiful photographs and take good pictures
We often want to capture certain moments on video so that the best or most significant moments of our lives remain in our memory. And we want them to last as long as possible, so that in the future we can revisit them and fully immerse ourselves in the mood. The quality of video is influenced by many factors: from the choice of camera to the final edit of the film that we want to keep in our home archive.
You will need
- - camcorder
- - computer
- - video editor
Instructions
Choose the camera that your budget allows at the moment. Of course, you can record from digital, but the quality of video shot using is much higher. Pay attention to three main parameters: the grain of the image, its lightness and color, especially color. The brighter the colors, the better.
When shooting video, try to hold the camera with both hands to avoid shaky video. Keep your arms close to your body with your elbows to minimize camera instability.
Video on the topic
Sources:
- Lesson on how to make a face like in the movie "Avatar" video in good form
Avatar is a small image that is used as a graphic component of a profile on a thematic forum, social networking site, etc. You can copy an avatar from a special website or make it yourself using any graphic editor.
You will need
- — Adobe Photoshop software;
- — image for the avatar.
Instructions
You can use any picture, photograph, etc. as an image. Initially, you can use any graphic file copied from the Internet, then you can try to repeat it on your portrait. Before you start working on the blinking avatar, you need to install Adobe Photoshop on your computer.
Open the program and double-click on an empty program field or press Ctrl + O to open the image.
Make a duplicate of the main layer that was created when loading the image into the program. Right-click on the layer in the Layers panel and select Duplicate Layer or press Ctrl + J.
The color levels change needs to be applied to the bottom layer. Click the top menu “Image” and select “Levels” (keyboard shortcut Ctrl + L). In the window that opens, move the middle slider to 2.35.
The top layer (newly created) also needs to have its levels changed. Press the keyboard shortcut Ctrl + L. In the window that opens, move the slider to a value of 0.40.
Now click the top Window menu, then open the Animation palette. In the layers panel, leave only the bottom layer visible; to do this, click on the eye image opposite the top layer - it will become invisible.
In the Animation window, duplicate the image by clicking the Duplicate button. Turn on the visibility of the top layer and make the bottom layer invisible by clicking on the eye image next to the corresponding layers.
In the Animation window, activate the Always loop option and click the Play button. If you want to decrease or increase the frame rate, adjust this value in the same window.
To save the resulting avatar, click the “File” menu and select “Save for web and devices...”. In the window that opens, select the Gif image format and 256 colors. Click the "Save" button.
To create a simple animation, you don’t have to study to become an animator. Sufficient tools are available in Adobe Photoshop CS5. You will also need to learn a few simple skills.
You will need
- — Russified version of Adobe Photoshop CS5.
Instructions
a photograph as the source image
with a skyscraper against the sky. Launch the program and open the required file: press “Ctrl” + “O”, select a picture and click “Open”. Select the Straight Line Lasso tool (hotkey “L”, switch between adjacent elements “Ctrl” + “L”) and select the skyscraper. Press the combination “Ctrl” + “J” to create a new layer and transfer the selected area to it.
Open a photo
with clouds, it should be larger than the skyscraper image. Press “Alt” + “Ctrl” + “I” and note the values that are in the “Width” and “Height” fields. Create a new file: “Ctrl” + “N”, in the “Width” field enter the same value as the photo with clouds, in the “Height” field - the same, but multiplied by three. As a result, you should have three documents: with a cut-out skyscraper, with clouds, and an empty document. In the following, they will be called documents 1, 2 and 3, respectively.
Switch to the document with the clouds, activate the Move Tool (V) and drag the image onto Document 3. Align it so that it completely covers the bottom. Switch back to Document 2 and drag the image onto Document 3. Align it so it fills the top. With Document 2 active again, click Edit > Transform > Rotate 180 Degrees. Then Edit > Transform > Flip Horizontal. Drag the result onto document 3 and align it to the center.
In the “Layers” window (if it is missing, call it with the “F7” hotkey) select the three existing layers with clouds (they should be named “Layer 1”, “Layer 2” and “Layer 3”) by holding down “Ctrl” and by clicking on each of them. Right-click and in the window that appears, click “Merge Layers.” Drag the newly created layer onto Document 1 and place it below the skyscraper cutout layer.
Click Window > Animation. At the bottom of the window that appears, click the only active button – “Create a copy of the selected files.” Another frame will appear. At the bottom of the frame the time it will be on the screen is displayed. In each frame, change it to 0.1 seconds.
Switch to the first frame and then to Document 1. Select the clouds layer and, using the Move tool, align its bottom right edge with the bottom right edge of Document 1. Switch to the second frame and then back to Document 1. Select the layer with clouds and align its upper right edge with the upper right edge of document 1. These two frames will be the starting and ending frames of the animation being created - the movement of the clouds.
Click the Create Tweaks button at the bottom of the animation window. In the Add Frames field, enter 20 and click OK. Delete frames 21 and 22 using the “Delete selected frames” button, which has a trash can logo and is located at the bottom of the animation window. The animation is ready. You can check this by clicking on the “Play” button.
Sometimes you get tired of posting your real photos on social networks. You can create a cartoon userpic to brighten up your boredom. It will also give a completely new look to your profile.
What should the group avatar be?
So let's start with a general theory of what your band photo should look like. Based on this information, you will understand how to make an avatar for the VKontakte group so that users like it and attract new members.
Obviously, the photo in the group must be consistent with the content posted in the community. This is a basic requirement for a picture: its content must be related to what you are writing about. The second requirement is the attractiveness of the image. Since all that a visitor sees about your group is the name and the picture, then, accordingly, the latter should be as attractive as possible so that the user wants to click and go to the page of the community itself. When you want to make an avatar for the VKontakte group, please take this into account. The last requirement for a group photo should be information content. Roughly speaking: it would be advisable to depict on the avatar something that would hint to the user what the group is doing. This can be done, for example, using inscriptions.
Making an avatar using online editors
The second option is to edit ready-made images (or create new ones) using online editors. Fortunately, there are now many services that allow you to develop your avatar both “from scratch” and using one of the ready-made templates. You just need to decide what you would like to see in the image for Ava, and then you don’t even have to worry about how to make an avatar for a VKontakte group without Photoshop - the resource will do everything automatically. There are quite a lot of such ready-made solutions on the Internet now. They are free and feature rich. The only disadvantage of working with such sites is the address of the resource that made you an avatar, located somewhere in the lower corner.
How to use wiki markup
Well, here we come to the most interesting and at the same time difficult section. Perhaps there are people among the readers who do not know what wiki markup is and are hearing this term for the first time. Therefore, especially for you, I will give the definition that “Contact” itself gives.
Wiki markup is a markup language that is used to format text on websites (usually classified as wiki projects) and allows easier access to the capabilities of the HTML language. On our site, wiki pages are a good alternative to regular posts and text navigation. If you need to create a large article with different text formatting (bold, underlining, headings, etc.) or add graphics to it, or simply create a colorful navigation menu for your community, a wiki is indispensable.
Just like WordPress (or any other CMS) has an HTML editor with which you create articles, Contact has its own editor for creating and editing wiki pages. It looks like this:
Using this editor, navigation menus are created, as well as articles with pictures, videos and audio recordings. Below I will discuss in detail how to work in this editor, but first I ask you to bookmark two links. They will help you a lot in learning wiki markup.
Making an avatar in Photoshop
If you don’t know how to make an avatar for a VKontakte group without a link to someone else’s site, you’ll have to use the most popular one: Photoshop. Working with it is quite simple, the main thing is to understand the basics, understand the elementary concepts and categories with which the program functions. If you already have at least minimal experience interacting with it, creating an avatar for you will not be difficult. If you don’t know at all how to make an avatar for a VKontakte group in Photoshop, you will be left with two options. The first is to seek help from a person who knows how to work in the program, the second is to study the features of the editor on your own: find lessons, examples of work, practice yourself.
Create a cover online
Now we’ll learn how to make a long avatar or VKontakte cover. We include the Canva website, which was mentioned earlier. Choosing sizes
template 1590×400. A long horizontal white sheet comes out. Then we select the layout.
We chose a layout with the ability to add multiple photos
.
In the middle you can place the name of the group
, or a slogan, and beautiful images around the edges.
Select the file without the image by clicking on it and at the top you can select a filter
. Once the cover is ready, all that remains is to download it to the website.
Today we will find out the current avatar size for the VKontakte group. After reading the article, you will not only get the answer to this question, but you will also be able to download a PSD template for a beautiful avatar and banner, made in the same style.
Taking into account all the latest changes, the maximum displayed avatar size for a VKontakte group is 200x500 px. It is worth noting that to obtain maximum quality you need to upload an image 2-3 times larger in size. Then the loss of picture quality will be less noticeable after uploading it to VK.
The main rule is to maintain the proportion of width to height: 2 to 5, respectively.
You now know the size, all that remains is to figure out when you should use the entire available height, and when you can make your avatar smaller. And this depends on several factors:
- Topic or niche;
- Product/service offered;
- Design
If you have a low-competition niche that is understandable to everyone, then it will be enough to place a logo, company name and sometimes a short explanation of your activities.
Titles Overheard | Ufa" or "Sports News | Ufa" does not need explanation - everything is clear. But the image of the logo with the name of the online store needs an explanation indicating the product that is sold in it: “online children's clothing store.”
Depending on the specifics of the product offered or service provided, additional space for benefits may be needed. By listing conditions that are beneficial to the client, you can stand out from your competitors. But because of them, the size of the avatar will have to be increased.
I don't think this is bad. If something helps increase conversions, you need to use this opportunity.
By playing with the design, you can get a completely beautiful and working version of the avatar of the maximum size, while placing a minimum of details on it.
This approach is acceptable for entertainment communities or groups of private photographers. And highly competitive commercial communities should make the most of the available profile size.
Create an avatar
Finally, after we answered the question “How to make an avatar for a VKontakte group?”, it’s time to think about what will be shown in the photo in the group. As already noted, it should be something thematic, attractive and informative. We invite you to take a piece of paper and a pen and sketch out a logo for your community. After this you can start creating the image.
This can be done using one of the methods indicated above. If you don’t know which avatar is better, you can resort to a simple but effective method of determining: voting in the group itself. Let people decide which photo is better.
– the basis for effective promotion. A beautiful avatar and cover can increase the conversion of users joining the community, as well as sales if the community is commercial.
If you want to choose a ready-made image, then you should know, find out about the size of the avatar for the VKontakte group.
Of all the available points, it is necessary to highlight the following:
- The image must be of high quality. All elements should be clear, without blur.
- The image should not contain watermarks: logos of other companies or communities, stock services, etc.
- The image you choose must be meaningful and the right size. There is no need to select an image of a BMW car in a community dedicated to Mercedes and vice versa. An avatar is the face of your community. It allows users of the social network to understand the focus of the community, its message and themes.
How to make an avatar for a VK group yourself in the correct size
? There are many graphic editors for this. The most convenient and popular is Adobe Photoshop. The program allows you to create images of any size in high quality. All this is achieved thanks to a large selection of auxiliary editor tools.
To get started, you need to create a new project in Photoshop.
To create a large picture you need to set the following dimensions in the window that opens:
Width: 250px
Height: 450px
After that, click the “Create” button.
A work area appears in front of us, where the process of creating a vertical avatar takes place.
The following dimensions must be specified for the cover:
Width: 1590px
Height: 400px
As a result, we get a picture in a horizontal position.
As a background for the ava, download any suitable high-quality image and place it on the template. To do this, go to the menu “File” - “Open”.
To add text, you need to select the tool with the letter “T” icon in the left panel.
After that, select the appropriate font and its size.
You can place text in any area of the picture.
If you don't want to create new projects every time, save these templates in PSD format. To do this, go to the menu “File” - “Save As”
After that, you can always open these templates and create new images.
The guide shows the appropriate sizes for a community avatar. They fit perfectly with the usual, classic format, as well as the new VKontakte design with cover.
The classic option means a design of this type:
The new cover design looks like this:
The best sites to create your own avatar from a photo
There are many services available on the Internet for creating avatars from photographs. Therefore, I decided to talk about several of the most interesting of them.
Face Your Manga
South Park Studio
Using the South Park Studio service, you can create your own character in the style of “South Park”, using thousands of available elements. “This is one of the best tools to create a “South Park Avatar” from a photo.
Pick a Face
Another great service with which you can make a userpic. It contains more than 550 projects and designs. You can create your own hero without starting from scratch.
WeeWorld
A well-known social site created for entertainment. With it, you can make new friends, send them messages, play games and create your own avatars. Using the avatar maker you can also create a cartoon character of your choice.
TheCartoonist
One of the most popular web services among users. With this tool you can transform any photo into a cartoon character. His goal is to help people who cannot pay for a drawing.
Cartoon Photo
Using Cartoon Photos, you can convert your photo into a 100x100 cartoon userpic in just one click. Do you want to change your facial expression and emotions in your photo? Or do you need to create an animated GIF from a photo? Then you should try this tool.
Meez
Awesome service for creating avatars. It can be used to create 3D animated avatars, which can then be directly exported to most social networks and blogs.
KusoCartoon
Helps you turn your photos into a cartoon character or avatar that can be used on Twitter, Facebook, Pinterest, Gmail, etc.
Portrait Illustration Avatar
Another great, free tool for creating avatars.
Picassohead
With this tool you can easily convert any photo from Picasso into an avatar or a cartoon character.
Cartoonize
Another free cartoon character generator that lets you create a cool cartoon avatar. Before choosing a userpic, you need to select an image and then add a cartoon effect. And everything is ready.
Creating an avatar on mobile devices
If you want to create an ava for the VK community from iOS or Android devices, then you should pay attention to specialized online services.
As an example, consider the Vkprofi service. To work with the site, you need to log in through your VKontakte account. After this, you will have the opportunity to create a cover, avatar, menu and pictures for VK posts.
Go to the "Avatar" section.
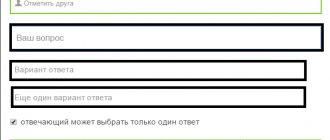
You have the opportunity to add pictures, text and sprites in the area highlighted in blue.
This creates the classic design of the following format.
To create a cover, go to the appropriate section.
Graphic elements and text are added in the right column.
To save the final version you need to pay for a license. One day of license costs 50 rubles.
Using Templates
If you want to find options for ready-made avatars, then pay attention to ready-made templates. You can download layouts in PSD format on the following sites:
You-ps.ru
– Large selection of templates for any topic. In addition to the sources, the site contains useful tutorials on using Photoshop. Downloading files from you-ps is free.
PS-Magic.ru
. Another useful site with design sources in PSD format. Just like on You-ps.ru, here you can find not only avatars, but also lessons on editing and creating them in Photoshop.
Ordering templates from freelancers
If you haven’t found a suitable design option on the above sites, then contact professional designers for help. Finding a web designer is very easy. To do this, there are many freelance exchanges with thousands of performers.
Kwork
. All services on the site are sold for 500 rubles. Hundreds of performers are ready to create a band design for you in the shortest possible time.
. The most popular freelance exchange in the CIS. Register on the site as a customer and publish a task to create an avatar for your public page. After this, performers will begin to respond to the task you created. Choose the candidate you like and start working with him.
Weblancer
. A similar exchange for finding freelancers. Place an order and expect responses from potential contractors to create a template.
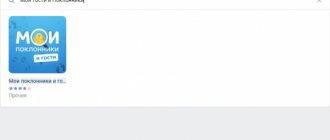
You will see a large list of hundreds of groups for this request. All of them belong to agencies and freelancers who design communities. In most groups you can not only order the development of a template, but also find ready-made options available for free download.