Hi all! Today I will tell you about how to add products to a VK group, to your personal page, and whether it is possible to create product cards from a mobile phone. Therefore, if you own a public page or a popular VKontakte profile and are learning to make money on it, I ask you to sit back and start reading. Ready? Then let's go!
Why do you need to add products to a group on VK and why is it beneficial?
On VKontakte they add products to groups in order to sell them directly on the social network. At the same time, a public page on VK can act as both a main and an additional platform for sales. And in some cases, creating a store on VKontakte is much more profitable than creating a website, and here’s why:
- the development process is as fast as possible - no knowledge of code or design templates is needed: just create a community and add products to it;
- you can do everything yourself, without incurring unnecessary expenses on hired workers - this will save your budget at the start;
- customers will be able to pay for goods directly within the social network, and you will be able to easily receive money into your bank account.
Selling through a group on a social network is relevant for private craftsmen and companies with small production volumes. For example, for those who knit booties, make brooches and jewelry from epoxy resin, or produce something unique.
The owner of the SOOQA.store group sells handmade soap there
With large sales volumes, it is more advisable to create an online store on another platform, and there are several reasons for this:
- the maximum limit for adding products is 15,000 items; if there are more of them, then it will no longer be possible to sell products in VK;
- the VKontakte catalog does not provide filters, except for price and sorting options: even if you add 100-200 products, people will already get tired of scrolling through the feed;
- the built-in CRM system allows minimal processing of orders, but is not suitable for serious analytics and large volumes of data.
This is why large brands and those who plan to seriously develop their business prefer to use VKontakte not as a sales platform, but as an additional source of traffic to the site.
How to add a service
The VK Services section appeared in April 2021. It allows communities to add price lists in addition to products. You can also place the address for providing services, the method for calculating prices, combine services into collections and upload photos to them.
You can agree on an appointment using personal messages from the administrator or the community. So how can you add such a price list for communities to VK?
- First, let's go to Management under the avatar to add VKontakte Services to the side menu.
- Find the Sections item and enable Services.
- We configure the items we need and save.
- Next, look for price lists on the right and click on the Add service entry.
- Almost ready, all we have to do is describe our proposal and choose a format. add photo and category. That's all!
This section allows the development of a business that is tied specifically to the provision of services, and not to the sale of goods.
How to beautifully design a group on VK: useful recommendations
Let's move on to the main part of the article: let's create a beautiful design for the VK group. To do this, let's look at the main elements that need to be added to the community.
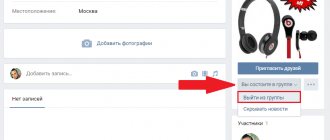
Uploading an avatar
First of all, after you have created a group on VKontakte, you need to upload an avatar. The ava must be recognizable: for example, a brand logo. If you created a group to promote your personal brand, then you can use your photo as an avatar.
Uploading an avatar is simple: to do this, go to the group and in the window with the avatar, click the “Upload photo” button.
Uploading an avatar for the VK group
Next, in a small window, click “Select file.” The file explorer will open. Upload the desired photo from your computer.
The final stage is choosing the area of the photo. Crop the photo so that the avatar window displays the main elements: for example, the company name or logo.
Selecting the avatar area
Then crop the photo for smaller photos. The selected thumbnail will be used in news, community lists and comments.
Minimum avatar size: 200×200 pixels. Formats: JPG, PNG, GIF.
Installing the cover
Now let's set the cover image. This is another important stage when creating a community on VKontakte.
On the cover you can display important information about the group: name, main sections, contact information. The cover should be beautiful and recognizable.
At the same time, there is no need to overload the cover with unnecessary elements: place only important information.
To upload the cover, go to the community settings section. In the settings - in the "Basic information" section - there is a line "Cover". Click Add.
Adding a cover
After that, download the finished cover from your computer.
This is what the community looks like with the cover:
Cover in the liters books group
Recommended cover size: 400x1590 pixels. Formats: JPG, PNG, GIF.
Adding a description
Be sure to add a description of the community. To do this, go to the group or public settings. In the “Basic Information” window there is a “Description” block.
Include useful information about the community: what the group is about, what you do.
Writing a description of the group
For example, if you have an online store, then indicate opening hours, methods of delivery and payment for goods.
Maximum description size: 4,000 characters. You can use Emoji and lists.
Menu
On VKontakte you can connect the community menu. To do this, open the group settings and go to the “Menu” section.
How to add products to a VK group: instructions
The instructions for creating a product in a VK group are the same for communities of any type. First of all, you must enable the feature in the settings.
How to enable the option
- Go to the group and click on the “Manage” button (under the avatar on the right);
- In the “Sections” block, enable “Products”;
- Next, fill out the expanded fields:
- indicate the regions in which you work;
- enable or disable the ability to comment;
- select currency;
- indicate the type of communication - through the seller or via a link. In the first case, you will need to select a contact person (administrator, owner, special responsible person, etc.), in the second, select the text on the button (go to the store, buy, etc.);
- Edit the store page - click on the appropriate button. Enter a detailed and “tasty” description, payment methods and delivery conditions. What is written in the topmost field will be displayed on the main page of the group as a link;
- If you check the “Store” box, a special application will be connected through which customers can add products to the cart and pay for them using the VK Pay service. The option works on the territory of the Russian Federation and only with the ruble (Russian);
- Let's move on, soon we will begin the algorithm for registering goods in the VK group, but first we will clarify the point related to the location of the section on the page. If you specify “Products” in the “Main block” item, it will be displayed directly below the main information about the group, that is, in the most advantageous place. Otherwise, it will “settle” in the column on the right, under the “Participants” section.
Many store owners are interested in whether it is possible to upload goods to a VKontakte group from the website, because if there are a lot of them, the process will take a lot of time. Currently, VK allows you to download cards strictly one at a time, through standard loading from your hard drive. However, there are a lot of applications and web services, called cloud parsers, that allow you to automatically upload and fully synchronize a site with a group on VKontakte. We will not cover this topic in detail, since its scale deserves a full-fledged article.
How to add a product
So, you have enabled the option and now you want to start creating collections. To add a product to a page in Contact for the first time, simply go to the group and click on the “Add” button.
A window will open with fields for the product description. You need to indicate the category, insert a description, add photos (up to 5 pieces, each size from 400 to 6000 pixels), indicate the price. If you check the “Product unavailable” sector, customers will be informed that this product is in your assortment, but is temporarily unavailable for purchase. When you're done editing, click "Add." The card will now appear on the page in its own section. If you click on it and press the "More" key, you will see an "edit" or "delete" key. By the way, do not forget to periodically review the products on the site and remove products that you no longer plan to sell.
Please note that you can download a QR code for each product. This is a new option for the social network, but it is becoming more and more popular.
How to make a selection
For convenience, all downloaded products should be sorted and collected into categories. Let's look at how to set up products in the VK group - to do this, open this block:
- Next to the “Add” button there is a “Create collection” button - click;
- Specify the name of the collection;
- Add a cover;
- Click "Create";
- Now go inside, click on the “Add Product” button and continue according to the adding instructions.
The same item can be added to different collections. The showcase will display the three most recently added cards, but if you check the “Main” field when creating a collection, its three items will always be in the top. If you want to move a product, simply grab it with your mouse and drag.
How to tag a product in a photo or story
At the beginning of October 2021, selling on VKontakte became even more convenient. In photographs, in stories, in the articles themselves, you can tap on the tag to immediately go to the product description and buy them.
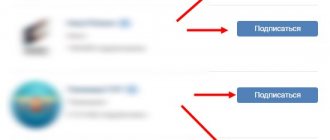
You can add products from your personal profile, community, and AliExpress service. Now we will tell you how to do this.
Imagine that you saw a cool T-shirt from a friend in the photo and next to it there is a small block with the price and name. All you have to do is click and place your order.
Before you add a product to VK yourself, remember that you will not attach more than 5 tags to one photo or post.
To get started, add your product to your favorites. To do this, you need to “Save it to bookmarks”.
To tag a photo, upload it and publish it. Then click “More” (in the mobile version, 3 dots on the right). Click on “Add Product”.
Next, place the snippet on the photo and save the result.
When the buyer sees your product and the price in the photo on the side, he will be able to buy it in one click.
Now let's talk about tags in stories. To get started, capture or upload your story. Then you need to go to the stickers menu and select “Product”.
All you have to do is move the snippet to the right place and post it.
To attach a product to an article, open edit mode. Place the cursor where you want to indicate the product. Click on “+” and you will see the product icon.
All that remains is to choose what we will attach and publish.
Ready! Personally, we like the method - less action and more shopping!
How to remove a link from a menu?
Sometimes during work there is a need to change or delete one of the menu items. You can do this by going to the “Settings” section.
Next, next to the desired item, click on the “Change” button.
In the window that opens, find “Delete link” and click on it.
After this, to confirm, click on the “Delete” button again.
All after these steps, when you return to the main page of your VKontakte community, you will see a new updated menu.