We have already discussed how to hide your VKontakte page. This is done in order to limit the ability of users to view our data and communicate with us.
After all, not every person wants all of their personal information to be available to any member of a social network.
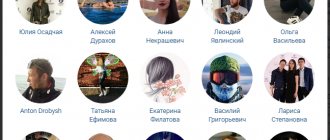
Likewise, any other user can block their page for you. The easiest option is to add you to the blacklist (see how to add to the VK blacklist). You will completely lose the ability to view its page.
Agree, I would like to know which of the users dislikes us so much, right? Now I will show you how to find out who I am on the VKontakte blacklist .
The long way
Its essence is as follows. If you go to the page of the user who added you to the blacklist, you will see this message.
That's all. You need to go to the page of all your friends. On the user’s page where you see such a message, you can say that he added you to the emergency situation.
This method is good if you have a couple of dozen friends. And if there are several thousand, what to do? There is a simpler option.
How to add or remove a person from the blacklist in VK, where to look for blocked friends?
These two methods will help you find out without programs who is on your blacklist. Also, speaking about what can be added accidentally, it is worth analyzing the algorithm for adding a person to the blacklist.
- The first option has an easy, but “non-random” scheme: in the right corner, at the very top, click on the small version of the avatar. From the proposed menu, select the item “My settings”;
- From a number of offered options, select the required option; at the moment, this is a black list. And a list of people you have banned will appear in front of you;
- then click on the blue “Add to blacklist” button at the top;
- A list with possible searches opens. And you simply enter the first and last name of the person you need. Or in advance just copy the link on his page and paste;
- you can select friends from a list of all options, but it will take much more time to search;
- select the person you want and simply add him to the black list by clicking on the button next to the name “Block”.
- under the avatar there is the inscription “Write a message”, and a little lower and to the right of “Actions” there is an ellipsis;
But some time may pass and it may become necessary to remove the person from the ban list. This is done as quickly and simply as the first operation, you just need to go through a similar technique:
- in the settings, in the “Black list” , find the user you need and simply click opposite his name on “Remove from list ”;
- or click on the three dots under the avatar on the page itself, where you select “Unblock”.
A service that will show who added you to an emergency
It's called 220vk. Here is the link:
https://220vk.com/bl
We've already used it. Here are the instructions - hidden friends in VK 220.
Go to the service. This is what the page we need looks like. Here, click the “Search who I’m blacklisted” button.
Scanning of your friends will begin. As you complete it, the pages of users who have blocked you on VKontakte will be displayed in the lower block. Wait until the operation is completed to view all pages.
Online service
The most popular resource that allows you to track the secret activities of any user of the popular social network VKontakte is the 220VK website. This is an online tool that appeared on the World Wide Web relatively recently and has wide functionality for obtaining private information.
220VK has the following functionality:
- Hidden friends (list of “Friends” that the user hides);
- Subscribers (a list of people who are subscribed to the object you are interested in);
- Online tracker (statistics of user’s online activity);
- Black list (list of ill-wishers who added you to the emergency situation);
- Closed friends (a directory of friends with a private profile);
- 6 handshakes (checks chains of mutual friends);
- Cities of friends (allows you to find out where your “friends” live);
- Date of birth (provides information about the date of birth and age of the account being verified);
- Saved Photos (provides access to the hidden “Saved Photos” album);
- Possible friends (gives a list of potential friends);
- Hiding friends (makes it possible to find out who is hiding your profile in the friends list).
In order to take advantage of the 220VK options, you do not need to install it on your PC, you just need to go to the official website of the resource (https://220vk.com/) and follow these steps:
- In the upper left corner, click on the “Log in via VK” button and log in by entering the username and password for your account.
- The server will require access to your account information, which must be authorized. It should be noted that you should not be afraid of losing your data and passwords, since 220VK guarantees reliable protection of personal data.
- There will be a side menu on the left side of the monitor screen. We need to select the “Black List” tab in it.
- In the window that opens, click on the “Search for who I am on the black list” button. This process may take some time.
- After the search is completed, the system will notify you that the scan is complete and display the results of the scan.
Finally, it should be said that sometimes the server malfunctions and the results obtained may differ from the real ones.
Update: an application on VK that tracks who added us to the emergency situation
Finally, an application has appeared within the social network itself, which analyzes and generates for us a list of users who have decided to blacklist us.
It's called Blacklist & Hidden Friends, and is available here:
https://vk.com/app3256362_-86272159
Follow it and click on the “Launch application” button.
The next step is to start scanning by clicking on the “Search for those who blacklisted you” button.
The procedure will be launched and a list of users will begin to be formed. The information is up to date - I checked it by comparing the data obtained in the previous steps. Everything fits together. The people who put me in emergency situations are displayed.
Looking for a blacklist on your page
It’s not difficult to find a section in your own profile. It is hidden in the settings sector.
Via computer
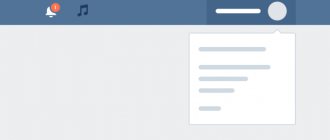
- On the desktop version of the site, look at the top blue frame. Find the round icon with your avatar on it, click on it;
- In the menu that appears, select the settings key, go to the section;
- The structure and subsections of the sector are indicated in the column on the right. Find the black sheet, click;
- A list of previously blocked pages will be loaded in front of you. You can add, delete, view profiles;
- A long column can be easily viewed by searching by people. At the top of the list there is a search engine field. Start typing the initial letters of the required name, and all inappropriate users will be immediately filtered out;
- If you have not blocked anyone, you will see a message in the empty field that the blacklist is empty.
We also recommend that you read our article on how to find out who is in emergency. It will help you understand who their friends banned you!
Via smartphone
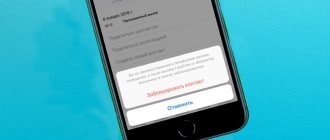
You can also find out who a person is on VK in an emergency using a phone – through the settings. In the mobile version, they are indicated by a round sign that looks like a gear.
- Go to the application, find the status bar with icons at the bottom. Double-tap on the last one on the right in the form of a man in a circle to bring up the main menu;
- In this section at the top you will see a gear, click on it and on the Emergency section;
- A list of banned people will appear. From here you can go to their pages and delete “forgiven” users.
Please note that if you particularly wish, you can bypass the blacklist and write to the user who blocked you.
Method two. How to get out of the “Black List” in groups on VKontakte?
Let's talk a little about what to do if you are put on the Black List
"in any group on
VKontakte
.
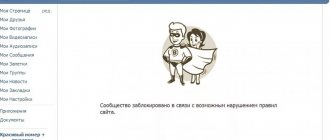
Getting on the community ban list is not so easy, but nevertheless it happens. True, getting out of the “ Black List
” of a group is also very difficult, and we will only show you a theoretical example of how this can be done.
Your task is to ensure that the community administrator follows your link. The link should look like this: https://vkontakte.ru/groups.php?act=unban&gid=(id of the community that blacklisted you)&id=(id of your page
).
You need to somehow ensure that the administrator of the group where you were banned goes to this address. After this you will be removed from the Black List
» of this community. In practice, this is difficult to achieve, but it's worth a try.
How to view the VKontakte blacklist and find out who I blocked?
You can see all the people you have blocked through your settings. To go to the desired section:
- Click on your name at the top right
- A small menu will open where we select “Settings”
Settings
- They consist of different sections, but we are only interested in one - “Black List”
Black list
- A window will immediately load with all the pages blocked by you. They will remain there until you remove them yourself.
Video: HOW TO GET OUT OF THE BLACK LIST OF A USER IN CONTACT?
For many people, the VKontakte website is practically a second home. The creators of the social network provided the opportunity for people to share their photos, upload videos, express their thoughts and tell news. And, of course, communicate with friends in real time.
The VKontakte blacklist resembles the blacklist in. When a person does not want to communicate with someone, with one click on the phone button he sends this person to ignore. The essence of the VKontakte blacklist is the same: all unwanted users are sent to a ban.
How to blacklist a person
On the main page, in the menu on the left, select the line “My settings”.
The “Black List” tab will appear on the page that opens. In the line you need to enter the name of the person you want to block, or a link to his page. Click “Add to Blacklist” and you’re done. The person will no longer be able to bother you. Administrators of groups and communities can also add users to the ignore list. Under the group avatar you need to click the “Manage Community” button. A window will open with the “Black List” tab. Further actions are the same.
Using the “Remove from blacklist” button you can unblock the user and again give him the ability to see and write.
You can find out which users you are on the blacklist by going to their pages. Limited access means you are ignored. If the person is not a friend, when you try to add him, the message “You cannot add this user as a friend” will appear.
It happens that for some reason you are banned
on any website. Placing a ban on your account prevents you from gaining access to features that you could previously use freely. Registering a new account can be pointless if access to the site is blocked at your IP address or the old profile stores the necessary settings, contacts, or maybe even money. To correct the situation, you can unblock the ban using a not at all complicated, but quite effective method.
You will need
- - own email
- - Internet connection
Instructions
Write to the support service from the mailbox you used to register your account on the site. The need to send a letter from exactly this mailing address is explained by the fact that when considering your request, the site administration will identify you precisely by the coincidence of the mailing address of the sender of the letter with the address to which the account is blocked.
Write as politely as possible, do not allow yourself to make rude statements, make any unreasonable demands or threats against the administration. Treat the site owners, as this will immediately determine how they treat you. Remember that only the administration has the authority to unban your account.
If the reason for the ban is not clear to you, then ask in a sensitive manner why your access to the site is blocked. Indicate the date and time you discovered this problem.
Be sure to wait for a response from the site administration. If the letter you received contains questions or indicates reasons for the ban that you did not even suspect, then try to find a rationale for your actions and state these facts in a response letter in a polite manner.
Video on the topic
You will need
- - Access to the Internet;
- - browser;
- — FTP manager.
Instructions
Register at https://webmaster.yandex.ru/ in order to gain access to the indexing statistics of your site in the Yandex search engine. If you have already received “Yandex Passport” before, then you will only need to log in to the service using your “Passport” login and password. Otherwise, you will have to go through the full registration procedure.
Add your site to the webmaster.yandex.ru service by clicking the “Add site” button located closer to the upper left corner of the service control panel. Please note that subdomains will have to be added separately..site”, then they will need to be added one by one.
Confirm your rights to the site by placing the text file suggested by the system in the root of the site directory. This can be done using the site management web interface or using an FTP manager by connecting to the root directory using the FTP data transfer protocol. To confirm rights to manage a domain and website, you can choose another method, but placing a text file is one of the simplest and safest.
Wait for your site to be added to the service. This service is updated hourly, and the Yandex search engine is updated with their pages, so do not expect instant results - it may take some time.
Make sure the site has been added to the service. If during adding you received a message from the system saying that the site was not added to the service because its indexing is prohibited, then you can be sure that the site is banned by Yandex.
Send a letter to Platon, the Yandex search engine user support service, if you are still not sure that sanctions have been applied to your site.
Video on the topic
note
“Black methods of promotion” (“Black SEO”) is a guaranteed way for a site to be banned.
Helpful advice
If you have removed all “prohibited elements” from the pages of the site and want it to be included in the index again, write to “Plato” (Yandex user support service) and, perhaps, the site will be removed from the ban.
Sources:
- Ban is not a death sentence in 2019
Having created your own page and at least filled it out a little for recognition - at least this is your own photo, last name and first name, places of study or work, interests, you can start adding and finding friends
. Friends on social networks, first of all, are your relatives, former classmates, classmates, co-workers, colleagues, neighbors, lifelong friends and acquaintances. Also, to expand your social circle, you can search for people by interests, addresses, music or photos.
You will need
- — computer/laptop/smartphone;
- - Internet access.
Instructions
The first thing you can do to find friends
“
VKontakte
” is to enter all the known names and surnames
of friends
(relatives, colleagues, etc.) in the “Search” field at the top of the page.
After that, look at who is the friend of those you have already added, who is writing to them on the wall - perhaps among them there will be your mutual acquaintances. Thanks to the service, which allows you to divide the total mass of friends
into groups “By university”, “By school”, “Colleagues”, “Relatives”, “Best friends”, you can immediately find common friends on other pages, depending on where you are met for the first time.
But this is only possible if a person has divided his friends
into the above groups.
If you have filled out your profile in sufficient detail, then click on any of your interests, favorite place, year of graduation or group, institute, favorite movie, and so on - and you will immediately receive a list of people who have indicated the same thing in their profile. This way you can not only find or, but also colleagues and simply interesting personalities.
You can also simply click on the tab located in the menu called “People”. Here a field will open for entering words, titles and names for search; on the right you can set a filter by region, school, university, age, gender, marital status, favorite places and place of work, life position, military service and so on. By entering, for example, the word Music in the search field at the top, you can get a list of all the people who indicated this word anywhere in the interests or fields about themselves. By setting a filter by any or all values at once, you can most accurately find a person with matching characteristics.
Find friends
“
VKontakte
” can also be used to search for interesting communities in which thousands of people belong. These can be communities of various companies, institutes, product manufacturers, stores, popular magazines and portals. To do this, select the “Communities” tab in the menu at the top and scroll through everything in a row to find what you need, or also enter words in the search field to make it easier to find the required community, or use a similar filter on the right by the region of communities and their type. In each community you can find a list of participants, where you can also search for the right people.
View friends'
and communities - various people with their points of view and interests leave their messages there, and perhaps there you will meet someone you know or just a very interesting interlocutor.
Video on the topic
Related article
Sources:
- how to find friends on VKontakte
Sometimes someone who used to be a friend becomes a stranger or even an enemy. And I want to isolate myself from his excessive attention on social networks. It’s a shame, but with the expansion of the information space, this need arises more and more often.
You will need
- — registered account on the social network “Vkontakte”.
Instructions
Open the VKontakte social network in your preferred browser. Enter your username and password in the fields provided if you are not already logged into your account. You will be taken to your VKontakte page.
If the person you want to add to your blacklist is among your friends, you must first remove him from there. To do this, on the left, under the inscription “Vkontakte”, select the “My friends” tab. Click on it with the mouse once. A page will open with a list of all the people you have added as friends. Find the person you intend to delete, for which you can use the search: enter a few letters of his first or last name into the search bar. The system will display the person you are looking for, click on the inscription “Remove from friends”.
Go to the service. This is what the page we need looks like. Here click the button “Search who I’m on the blacklist”.
Scanning of your friends will begin. As you complete it, the pages of users who have blocked you on VKontakte will be displayed in the lower block. Wait until the operation is completed to view all pages.
Why is a blacklist needed?
Every user is different.
There are well-mannered people, and there are those who definitely need to do something nasty or be rude. In order not to spoil the nerves, a black list was invented. Once on the ignore list, a person sees only the first and last name, as well as the user’s photo. All photographs, videos, and wall posts remain closed to him. He also has no right to write comments, personal messages, or invite people to meetings. In the middle of the ignoring person’s page, the message “The user has restricted access to his page” is displayed.
The blacklist is a kind of protection against unwanted communication, spam and annoying users.
Method one. How to bypass the “Black List” on VKontakte?
Bypass blocking by another user on the VKontakte
"You can use an anonymizer. An anonymizer is a program that allows you to connect to the Internet anonymously, while hiding the user's real IP address. Thus, if, for example, you are blocked by IP address in any chat, forum or website, then you can safely go there through the anonymizer.
This is also the case with VKontakte
"
VKontakte
account through the anonymizer and freely gain access to view the page of the person who previously put you on the
Black List
. But there are a couple of nuances here.
How to bypass the blacklist and how to get out of the blacklist in VKontakte
Firstly, the VKontakte
“can figure out that you are using a “left” program and mistake you for a fraudster. It is possible that after this your account will be temporarily blocked until the circumstances are clarified.
Secondly, with the help of an anonymizer you will only bypass the “ Black List”
", but you will not be able to remove yourself from it. Your account will remain on the other user’s blocked list, and you will always need to use an anonymizer to bypass the blocking.
You can download one of these anonymizers from this link.