VK developers try to keep up with the times and regularly add new useful functions in accordance with the wishes of users. So at the end of 2021, the ability to send voice messages was added, and more recently - video broadcasts in VK. Naturally, it is impossible to implement these functions without a normally working microphone, and many users are faced with a ban on access to the microphone on the VKontakte social network. That is why we will tell you how to allow access to the microphone in VK!
How to allow access to the microphone in VK
The social network Vkontakte continues to delight its users with more and more new opportunities. At the end of 2021, VKontakte added a voice input function that allows you to record and send voice messages in a regular text chat window. VK also recently introduced the ability to organize video broadcasts, allowing you to create and conduct streams from your page on the social network. At the same time, people who want to do this may encounter the system message “Access to the microphone for the site vk.com is prohibited in the user’s browser . In this material I will tell you how to allow access to the microphone in VK, and what methods will help us with this.
Allowing access to the microphone on VK.com
Guide to setting up a microphone for VKontakte
Telegram channel Programmer and business. Every day there are interesting stories about how a programmer builds a business.
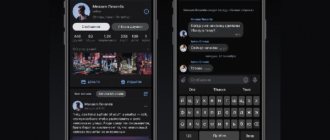
New functionality regularly appears on the VKontakte social network. A voice input option is now available to users. You can record messages and send them to other people. To do this, you need to use the text chat window. But not everyone manages to do it the first time. In this article we will look at how to turn on the microphone in VK for making calls and sending voice messages. We'll talk about ways to set it up on your computer and phone. You can easily send recorded notifications to users.
Causes of dysfunction
Most browsers, when a site accesses the microphone, prompt the user to allow or disable this operation by clicking on the corresponding menu button.
If for sites using an unsecured connection (http), the user's choice will be fixed for one session, then for secure sites (using a secure http connection ) the user's choice can be fixed for all subsequent sessions.
Therefore, if you accidentally clicked on “ deny ” when a sign about the possibility of accessing the microphone appeared on the VK website, the system will remember this and will subsequently block VKontakte’s attempts to gain access to your microphone.
In addition, the lack of access to the microphone can be caused by its being disabled in the Windows OS settings, the physical failure of the device, as well as the “human factor” (the microphone simply “forgot” to be connected to the computer).
Use the microphone to chat in VK
Is it safe to give your browser access to your webcam?
To make the user's stay on the Internet safe and comfortable, browsers impose various restrictions on sites: block pop-ups, warn about requests for location, access to a webcam, etc. Due to this, web browsers guarantee the protection of confidential information that can be used by fraudulent websites. - resources for your own purposes.
However, only the user has the choice whether to allow a certain site access to browser elements or not. Therefore, experts advise carefully choosing web resources for work and ignoring notifications coming from suspicious sites.
Ways to allow access to the microphone on VKontakte
So, to turn on the microphone in VK, we need, first of all, to do the following:
- If, when you try to activate the microphone, a sign appears asking for access to the microphone, click on “Allow” ;
Click on “Allow” to confirm VK’s access to your microphone
- Check if your microphone is connected to the PC (if you connect an external microphone);
- Make sure your microphone is not muted on the system. Go to Control Panel – Hardware and Sound – Sound. In the window that opens, go to the “Recording” tab, where the list of microphones available in the system is located, and make sure that your microphone does not have the “Disabled” status. If it has this status, then move the cursor over this microphone, right-click on the mouse, and select “Enable” in the menu that appears;
Click on "Enable" to activate your microphone - Remove the microphone access rule in your browser settings . For example, in Chrome this is done by going to “Settings” - “Show additional settings”. Then, in the “Personal Information” option, click on the “Content Settings” button. Find “Microphone” there and click next to the “Configure exceptions” button, a list of sites with rules set for them will open. If there is a site “vk.com” and next to it there is a “Deny” rule, then by clicking on the cross on the right, delete this rule, then go to VK, and when asked to grant access to the microphone, click on “Allow” ;
- Change a number of browser settings . While on the VK website, click on the padlock to the left of the address bar, find “Microphone” there, and select “Allow”. For example, for Firefox you need to click on the padlock, then on the button with the right arrow - “More details”. Go to the “Permissions” tab, find the “Use microphone” option and, if necessary, activate the “Allow” option;
- Check your microphone settings in Adobe Flash Player . Despite the fact that VK developers have recently abandoned the outdated Flash functionality in favor of HTML5, I still recommend checking your microphone settings in Adobe Flash Player. Go to the Control Panel - in the "View" option on the right, select "Large Icons". Find “Flash Player” on the left and click on it. In the window that opens, select the “Camera and Microphone” tab, then click on the “Camera and microphone settings for website” button. Look through the list of sites, and if you find vk.com there, then change the settings for it to “Allow”;
How to enable microphone in Windows 10 on computer
How to set up a microphone in Windows 10
Windows 10 users very often encounter difficulties when recording audio or unexpected “loss” of the microphone. Before you begin setting up a device, it is strongly recommended to check its presence in the system. To properly connect the device, the user must proceed in the following order:
Insert the plug into the appropriate slot, then right-click the Windows flag in the lower left corner of the screen and select Device Manager from the list that appears.
Expand the "Audio Inputs" and "Audio Outputs" submenus.
And find your device in the list.
If problems occur, the user can update the driver by right-clicking on the microphone header.
And if this does not help, remove the device, and then, after updating the hardware configuration, add it back to the list; as a rule, this is enough to normalize the microphone under Windows 10 - only if the problem is not in the device itself.
You can quickly adjust the volume of an input recording by typing "Sound" in the Search box and selecting "Sound Mixer Settings" from the output list.
In the window that opens, the user must first select the desired device from the drop-down list, and then, by moving the slider, adjust the volume level.
To access additional settings, use the same “search” to find “Control Panel.”
Go to the "Sound" section.
And on the already familiar “Recordings” tab, select the desired device and open “Properties”.
Here, in the Levels tab, the user can adjust the volume of the input signal, as well as set additional gain.
And to avoid wheezing and hissing, turn off additional effects in the “Enhancements” tab.
Also in Properties you can temporarily disable audio recording from the microphone, set the device as the main one, etc. — how to do this was described in the section on setting up under Windows 7.
Turn on the microphone in the Sound panel
The first thing you need to do is activate the device on the Soundbar.
Follow these steps:
- In the search bar, type “Control Panel” and navigate to the application;
- Change the sorting to “Large Icons” (as shown in the screenshot);
- Open the Sound panel and go to the Recording tab;
- On the empty area, right-click (we'll use the acronym PKM in this article) and make sure the "Show disabled devices" and "Show disabled devices" options are selected;
- Find your microphone, click on it using PCM and check the Enable box.
If it was already in the list before and/or the Enable checkbox, then the problem is most likely in the driver.
Checking the microphone driver
To eliminate problems caused by incorrect driver operation or an outdated version, you need to update it.
To do this, follow this algorithm:
- In the search bar, enter “Device Manager” and open it;
- Click the arrow next to the Audio Inputs and Outputs section to expand the list of devices;
- Right-click your device name, then Update Driver;
- It is also worth trying to roll back the driver to an earlier version. Since Windows automatically updates them to the latest versions, it makes sense to try manually downgrading to the old one - it may have better compatibility with your device and operating system.
After updating a driver or downgrading to a previous version, be sure to restart your computer.
Setting your privacy options
If devices are turned on and drivers are working correctly, the problem may be with your operating system's privacy settings. To enable the microphone in Windows 10, follow these steps:
- Open Windows Settings via the Start menu or use the WIN + I key combination;
- In the “Privacy” section, find the “Microphone” entry;
- Grant your microphone access to the software it needs, and set access permissions for desktop apps.
You can ban apps where you don't intend to use the microphone and limit yourself to the ones you need. However, to be on the safe side, it is recommended to set “On” everywhere.
How to allow access to the microphone in VK
Today in our article we will tell, show and teach you how to allow the VKontakte social networking site to use a microphone.
You will learn how to enable the microphone for VK in the browser. This question is now more relevant than before; at the moment you may need a microphone in VK for:
- Sending voice messages.
- Conducting online broadcasts.
- Making calls.
- Other voice actions.
As you can see, the use of a microphone and the interaction of the VKontakte site with your browser is more than justified.
Ways to solve the problem
Problems with sending voice messages to VK can arise for various reasons. First of all, you should check the functionality of the microphone. Then you need to turn on the device by going to the section called “Recording Devices”. Next, find and select the “Listening” column and check the appropriate box. Now the sounds will be played through the speakers on the PC. Below we will look at ways to solve problems related to microphone settings.
Method 1: On a computer
To record voice notifications in VK, you must perform certain actions on your computer. If problems arise, you can fix them yourself. No special knowledge is required. Now we will describe the problems that you may encounter and methods for solving them. First way:
- When you activate an audio recording device, it should automatically prompt you to use the device. You need to confirm it.
- When using a third-party device, you should find out how correctly it is connected. To do this, use the section called “Sound” in the Control Panel.
- If the settings are not set correctly, you must delete the settings in the browser and enable the client setting in automatic mode.
- Perhaps the browser is set to prohibit the use of a microphone. To remove it, you need to adjust the settings or use a different browser.
How to allow access to the microphone in VK
Contents of the article (navigation)
There are 3 simple ways to allow or block VK from using your microphone
- Enable the microphone in the browser address bar.
- Turn on the microphone before use.
- Enable the microphone in the browser settings.
It’s up to you to decide which method to use, but let’s take a closer look and analyze each of them.
Turn on the microphone before use.
The easiest way to activate a microphone in VK is to go into a dialogue with a friend and click on the icon for recording a voice message; the site will automatically ask you for permission to use the microphone.
Below is a screenshot of what it looks like.
Enabling the microphone in the browser address bar
The following is the simplest and easiest way to solve this problem. To turn on the microphone in VK you need to:
- Hover your mouse over the padlock in the address bar of your browser.
- Press the protocol lock.
- Allow microphone use.
To make it more clear to you, below is a screenshot of what you need to do.
Everything ingenious is simple.
Enabling microphone in browser settings
The most difficult method is to allow the VKontakte site to use a microphone in your browser settings. Below we will show how to do this using the example of the Google Chrome browser, but in Opera and in Mizil the procedure is approximately the same.
- Let's go to the browser settings.
- Additional settings.
- Content settings.
- Microphone.
- Allow on VKontakte yes.
This method is the most difficult, but no less relevant. Let's look at the most frequently asked questions on this topic
How to prevent VK from using a microphone
To prevent the VKontakte site from using a microphone, you can use the permission method through the address bar or through the browser settings and instead of allowing, check the block box.
As it is shown in the screenshot below
How to allow access to the microphone on your phone in VK
If you encounter a settings problem on your mobile phone:
- You need to go to your android settings.
- then go to the application management section.
- Next, find the official VKontakte application.
- Go to Manage Permissions
- Allow an application to use the microphone
We hope you find our article useful, we welcome your comments and observations
Activating the microphone in the Yandex browser
Before you turn on the microphone in your web browser, you should make sure that it is properly connected to the computer, configured, and generally works normally in the operating system environment. The guides provided in the links below will help you do this, but we will begin to consider all possible options for solving the problem voiced in the topic of the article.
Read more: Checking the microphone in Windows 7 and Windows 10
Option 1: Activation on request
Most often, on sites that provide the ability to use a microphone for communication, you are automatically asked to provide permission to use it and, if necessary, turn it on. Directly in Yandex.Browser it looks like this:
That is, all that is required of you is to use the microphone call button (start a call, voice a request, etc.), and then click “Allow” in the pop-up window after that. This is only required if you decide to use the voice input device for the first time on a particular website. This way you will immediately activate it and be able to start a conversation.
Option 2: Program settings
If everything was always done as simply as in the case discussed above, this article, as well as such a high interest in the topic in general, would not exist. It is not always the case that this or that web service requests permission to use the microphone and/or begins to “hear” it after it is turned on. The operation of the voice input device can be prohibited or disabled in the web browser settings, both for all sites, and only for a specific one or some. Therefore, it needs to be activated. To do this, follow these steps:
- Open the web browser menu by left-clicking (LMB) on the three horizontal stripes in its upper right corner and select “Settings”.
In the side menu, go to the “Sites” tab and in it click on the “Advanced site settings” link marked in the image below.
Scroll down the list of available options to the “Microphone Access” option block and make sure that the device you plan to use for voice communication is selected in the list of devices. If it is not, select it from the dropdown list. Having done this, set the checkbox next to the “Ask permission (Recommended)” item if it was previously set to “Prohibited”.
Now go to the site that required you to turn on your microphone and use the call function. In the pop-up window, click on the “Allow” button, after which the device will be activated and ready for use.
Additionally: in the “Advanced Site Settings” subsection of Yandex.Browser (specifically in the block dedicated to the microphone, which is shown in the images from the third paragraph), you can see a list of sites that are allowed or denied access to the microphone - corresponding tabs are provided for this. If any web service refuses to work with a voice input device, it is quite possible that you previously prohibited it from doing so, so if necessary, simply remove it from the “Forbidden” list by clicking on the link marked in the screenshot below.
Previously, in the Yandex browser settings you could turn the microphone on or off, but now you can only select an input device and determine permissions for its use for sites. This is a safer, but, unfortunately, not always convenient solution.
Option 3: Address or search bar
Most users of the Russian-language Internet, to search for this or that information, turn to either the Google web service or its analogue from the Yandex company. Each of these systems provides the ability to use a microphone to enter search queries using your voice. But, before using this function of the web browser, you must grant permission to use the device to a specific search engine and then activate its operation. We previously wrote about how this is done in a separate article, and we recommend that you read it.
Read more:Voice search in Yandex.BrowserActivation of the voice search function in Yandex.Browser
How to allow access to the microphone on VK (VKontakte)
VK developers try to keep up with the times and regularly add new useful functions in accordance with the wishes of users. So at the end of 2021, the ability to send voice messages was added, and more recently - video broadcasts in VK. Naturally, it is impossible to implement these functions without a normally working microphone, and many users are faced with a ban on access to the microphone on the VKontakte social network. That is why we will tell you how to allow access to the microphone in VK!
How to take a photo
- Open the attach menu.
- Select "Photo".
- At the top right you will notice an icon that was not there before. It is very similar to a webcam. Feel free to click on it with the left mouse button.
- All that remains is to take a photo, smiling or making a funny grimace first.
What if the webcam doesn't work?
What should you do if, for some reason, she doesn’t want to work on VKontakte? Try this:
- Check whether the camera is connected to your computer (it’s trivial, but it often happens that this is where the problem lies, so that’s where you should start).
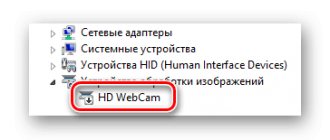
- Make sure that drivers specifically for your webcam model are installed on your computer or laptop.
- Allow the webcam in your internet browser. Perhaps he is the one blocking access to it?
- Update your internet browser to the latest version (and for God's sake, don't use Internet Explorer).
This concerns the camera on
a social network. Now let's talk about the second innovation.
Why doesn't the microphone work in VK?
In fact, the microphone in VK may not work for several reasons, and accordingly, the methods for allowing the use of a microphone in VK will vary.
It is worth noting that the first time you access the microphone on any site, the browser prompts you to allow or disable the use of the microphone. The user may inadvertently or mistakenly deny access to the microphone, in this case:
- On sites with an insecure http connection, the user's selection will only be applied for that session;
- On sites that use a secure https connection, the user's choice will likely be captured and applied to all subsequent sessions.
In addition, the microphone may be unavailable or disabled in the operating system settings, or it is also possible that the microphone is simply broken!
Second innovation
Not so long ago we told you on VKontakte.
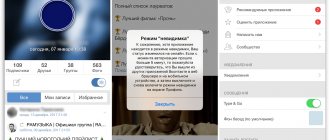
You can now attach photos in dialogs directly from the clipboard! Fantastic? No - reality on VKontakte. As far as you know, previously it was enough to drop a link to an image in a chat, and it would appear in the conversation. Now you can simply right-click on any image on the Internet and “Copy image”, and then use the familiar key combination and paste it into the text input field. Thus, it is, unfortunately, impossible to move pictures from a computer to Contact (for now). However, you can make a print screen in the same way (the key of the same name on the keyboard) and also insert the resulting picture into messages. Try it, it's very convenient! So, from our article you learned not only how the VK webcam is used, but also what to do if the webcam does not work, as well as how to quickly and conveniently share photos and pictures on a social network, simply pasting them from the buffer exchange.
How to allow access to the microphone in VK (VKontakte)
So, how to allow access to the microphone in VK? The cause needs to be determined, so we recommend trying the following:
- If the microphone is external, that is, connected to a computer, then it is worth checking the connection;
- If, when activating a microphone in VK, a message appears asking for access to the microphone, you must allow access by clicking on the “Allow” button;
- We recommend checking your browser settings. To do this, click on the lock icon in the address bar and turn on the microphone if it is turned off;
- You need to make sure that the microphone is enabled in the system settings. To do this, you need to open the Control Panel and select the “Hardware and Sound” section, then go to the “Sound” subsection, select the “Recording” tab and check whether the microphone is turned on;
- You can also check your microphone settings in Adobe Flash Player. To do this, open the Control Panel, select “Large icons” in the View option, find Flash Player and left-click. This will open a menu where you need to select the “Camera and Microphone” tab, then click on “Camera and microphone settings for the website” and select “Allow” if Vkontakte is in the list;
- Finally, you can log into VK in another browser!
A few more tips for unblocking access to voice input
If Yandex.Alice still cannot hear you, or hears you poorly, then we also recommend doing the following:
| № | Advice | Peculiarities |
| 1 | Check if your gadget has enough free space. | A full phone memory can cause problems with the assistant. |
| 2 | Make sure you have a stable internet connection. | Reboot your router if necessary. |
| 3 | See if your Alice has voice activation enabled. | To do this, you need to go to the settings of the Yandex.Browser application (the button with three horizontal lines). Next, select “Settings” and check the “Voice Activation” option. It should be in the "On" position. If necessary, activate it and launch the assistant. |
How to allow access to the microphone in VK (Vkontakte)
If the user once denied access to the microphone for VKontakte, then this action was saved in the browser settings. To cancel this action in Chrome and allow access to the microphone in VK you need to:
- Open browser settings by clicking on the button with three dots;
- Select “Settings”;
- Select “Advanced” at the bottom of the page;
- Click on the “Content Settings” section;
- Select the “Microphone” tab and, if there is a VKontakte site in the “Block” section, then you need to delete it by clicking on the cross;
In these simple ways you can allow access to the microphone in VK or on other sites in the browser! You can also learn from us how to surf VK invisible offline!
How to enable the microphone in Yandex Browser on Android
To unlock the voice input function in Yandex.Browser on Android, you must perform the following operations:
- Go to the settings of your gadget (swipe your finger from top to bottom on the unlocked screen, and click on the gear in the top right);
- Select the section with applications (“All applications”) in the list of settings;
- In the list of programs, find “Yandex.Browser” or “Alice” and tap on it;
- By entering the application settings, select “Permissions”;
- In the list of permissions, find the “Microphone” option. Set this option to active (On). Exit Settings;
- Launch your Yandex.Browser or tap on the Alice assistant activation icon;
- Give the application permission to record audio data, which is necessary for its stable functionality;
- Try talking to “Alice” as usual. Usually, after this, the assistant recognizes commands well and responds to them.
How to allow access to the microphone in VK
VKontakte is one of the most popular social networks in Russia. Thousands of users use the service and the services it provides every day. By registering on VKontakte, you can not only correspond via messages, but also view the personal pages of friends, learn new information from thematic groups and even transfer money. Not long ago, a new useful feature appeared - the ability to call through a social network, which allows you to significantly save on long-distance and even international calls. But in order for another user to hear you, you need to allow the service access to your microphone on your phone or computer. How to do it?
How to make a video call?
If the camera was successfully connected and it works, then we are on the road to complete success. First, go to the settings of the VKontakte service under your own account. Below the logo, find two words: “My Settings.” Go to the “Privacy” tab. It is located at the top of the screen and look for the line “Who can call me via video call” in the “Contact me” section.
Set it to any variable that suits you, but it’s better to set it to “All friends” first.
Ready! Go to the “My Friends” tab on the left side of the screen and look at the screen. If in the lists, next to someone’s name, a camera icon appears, it means that your subscriber, like you, has everything correctly configured for video communication.
If no one has this icon, it means that your friends are not on a video call or your friends do not have a camera connected. Text them for now.
If someone has a camera icon, then click on it and after a few seconds your friend will appear in the window.
Why is access to the VKontakte microphone prohibited?
First, you need to understand the reasons why your microphone is not working. The fact is that when you enter the site, the service immediately asks you for permission in the form of a window with two buttons: “Allow” and “Deny”. Not every one of us understands what it is, and sometimes we simply don’t have time to figure it out or even read the notification at all, so we just immediately click on “Ban”.
Browsers that use a secure connection (characterized by adding the letter “ s” to regular http in the address bar, that is, “ https”) remember your choice and are not offered to allow access in the future. But now you need to make a call using VK, but the microphone does not work. Don't panic because it's easy to fix on your own.
Another reason may be that the microphone is not connected to the computer at all or is not accepted in the settings. It also happens that the device breaks down for quite ordinary reasons. In the latter case, all that remains is to purchase a new microphone. You can buy it at any specialized store.
How to set up the equipment?
First, connect the video camera.
There may be three options:
- web camera with USB interface;
- IP video camera wireless, or with RJ-45 connector;
- video camera with analog or SDI output;
The easiest way is to connect a USB camera. Simply plug the USB connector of the camera cord into the appropriate socket on your computer.
Please note that if your camera has an interface that supports USB 3.0, it is unlikely to work through a USB 2.0 connector. These connectors are compatible and similar in appearance, but have different colors. USB 3.0 is marked in blue, very rarely red.
After connecting, the operating system will detect a new device and if there is a corresponding driver in its database, then you don’t need to do anything, it will automatically install the device software itself. You may need to restart your computer.
If this does not happen, you will need to install the driver from the disk that came with the camera. If there is no such thing, then you need to find it and download it on the Internet.
You can check the camera's performance using the popular Skype application. Select the “Tools” tab at the top of the program window, then “Settings”. You can use the hotkey combination CTR+. And select "Video Settings". If you see an image from the camera in the window that pops up, then everything is fine.
In Windows XP, the camera connection can be checked using standard operating system tools.
You should connect and identify the IP camera in a slightly different way. First you need to install the IP Camera DirectShow Filter driver, which will emulate an IP camera like a web. You can also use VH Multi Camera Studio.
Connect the camera with a cable with an RJ-45 network connector to the computer.
If the camera even has wireless connectivity, the first turn on for setup must be done via a cable.
It may turn out that your computer only has one network connector, which is already used to connect to the Internet. In this case, you will either have to sacrifice the Internet during installation, or install an additional network card.
To see the image, you need to enter the camera's IP address in the browser command line.
If you would like to use a regular video camera, you will have to use cards or external video and audio input modules. For example, Mini Recorder Blackmagic Design for SDI and HDMI interfaces. For an analog camera, you need to purchase a composite signal to USB converter.
A little expensive, but the best device in this regard is the Blackmagic Design Intensity Pro 4K. Although you can choose something simpler, such as EasyCap DVR, which costs only $15. If you don't need to count the beard hairs of your interlocutor, then this device is quite suitable.
But in any case, connecting an analog video camera to the VKontakte service will depend on the compatibility of the software that comes with the device or is supported by it. There is only one piece of advice, even for engineers who despise those who read the instructions before installing equipment, to still read it. You will find a lot of interesting things there.
The microphone integrated into the camera will connect without any problems. But if you have a separate device with a USB interface, then you may need to install a driver. A regular microphone with a mini Jack connector can be safely inserted into the pink jack next to the headphone output.
How to allow access to the microphone in VK
Today we will tell you how you can allow VK access to the microphone, what to do if access is denied and how to solve this problem.
VKontakte never ceases to delight its members with additional features and ever-expanding functionality.
At the beginning of 2021, users were already making full use of voice messages, which could be recorded using voice input directly from the dialogue window.
But often users are presented with a system message “Access to the VK microphone is prohibited.” Why is this happening and what to do?
How to allow access to the microphone in VK.
To turn on the microphone for recording in VK, you should use the following algorithm of actions:
- If during activation of the recording device a window appears asking for permission to use it, click “Allow”.
- The recording device may not be connected to the computer (assuming it is not built into the PC).
- If you cannot allow access to the VKontakte microphone, you should check whether it is disabled in the system. You need to go to “Control Panel” - “Hardware and Sound” - “Sound”. In the window, click on the “Recording” section; it contains a list of connected equipment. Determine that your microphone is not set to "Mute". If this is not the case, correct it.
- Remove the installed rule in Internet Options. In Chrome, this can be done by opening “Settings” - “Advanced settings”. In the “Personal Data” section, click “Content Settings” . Find “Microphone” and tap “Set Exceptions.” A list of web pages with directions to use will appear. If you have a VK web project and it says “Deny” next to it, then you need to click on the cross and get rid of this rule. Go to the dialog again and when the system window appears, select “Allow”.
- Change several browser options to allow access to the VK microphone. When you are on the VK site, click on the lock next to the field for entering the address, click “Microphone” and “Allow”. If it's Firefox, select "More details". Open the “Permissions” section, find the “Use Microphone” option and, if necessary, activate “Allow”.
- It is also worth trying to change the options in Adobe Flash Player or change the browser to use sound recording equipment on the VK social network.
To turn on the microphone in VK, you should use the above methods until the cause of the blocking is eliminated. Most often, it is enough to simply allow access or delete the desired rule that did not allow the device to be used to record sound.
Enabling and setting up a microphone in Zoom on a computer/laptop
Typically, the most common problem with microphone (or camera) performance when using this application is the lack of access of the microphone itself to Zoom. In simple terms, the microphone needs a separate connection to the application in the settings of your computer’s operating system itself.
The app is not allowed to access the microphone
To allow Zoom to use your microphone, go to Settings in Windows 10.
Next, you need to go to the “Privacy” section and click on the “Microphone” tab.
A list of programs that use the microphone will open, among which you should find the Zoom application and allow access for it by selecting the recommended enable tab.
For Mac: “System Preferences” > “Security and Safety” > enter the password > go to the “Privacy” tab > select “Microphone”, then allow the application access to the microphone or camera (check the Zoom box).
Unmute your microphone in the Zoom app
When you enter a conference and there is no sound in the program, this may first of all be due to the hasty closing of the previous dialog window when the user did not click the “Enter audio conference from computer” function. To do this, find the “Enter audio conference...” option in the lower left corner of the application and click on it. Then click on the blue “Enter the audio conference from a computer” button in the dialog window that appears.
After the conference has been started, you can turn on the microphone using the “Space” key on the keyboard (press and hold).
This will only work if the blue button was pressed and the connection to the conference was successful.
Look in the lower left corner of the application, where there should be an icon in the form of a crossed out microphone with the caption “Turn on sound” - to launch this function, simply press “Space” or left-click on the icon.
In a similar way, you can solve the problem with displaying a picture, that is, a camera. The camera may be turned off during a conversation, and your interlocutors cannot see you. You should also click on the icon representing the camera, which is located on the control panel. If the program displays the error “Video display cannot be enabled,” you need to go to the computer camera settings - in the same way as with the microphone.
Setting up your microphone and other devices in Zoom
If two cameras were connected to the computer (for example, you have a laptop with a built-in “webcam”), and there are also additional microphones and acoustic devices (speakers, headphones/headset), you must also go to the Zoom settings and select tabs "Video" and "Audio". By clicking on any of them, all currently used devices will open in front of the user, where he needs to select the ones he needs.