Let's talk about how to make a header at the top in a VK group. In the VK group you can use 2 types of covers: horizontal and vertical.
The very first covers are horizontal, otherwise called avatars. They were used to make a combined design along with a banner. When the picture on the banner smoothly transitioned to the avatar. A consistent design was possible when the information section opened in a separate tab.
In the new design, the information section cannot be hidden anywhere; it is always at the top, and the banner goes too far down. Unless you don’t fill out the information at all. Therefore, the general design: banner + vertical avatar cannot be created.
But it became possible to make a horizontal banner - a header for the group.
What image size is appropriate?
You can only upload an image with certain proportions and dimensions to the header.
The official size of the header is 795x200px, but I recommend making the image 2 times larger. Because when loading, VKontakte compresses images, and it may become worse in quality. To prevent this from happening, we make the image 2 times larger and when loading it will be exactly what we need.
Therefore, we make the size 1590x400px.
For dimensions for the remaining elements of the group, as well as how to make an adapted cover for a mobile phone, see the article All design sizes for VKontakte groups.
Menu development, landing page
Adding menus is not as simple as adding covers or banners. But it’s not so difficult that we can’t cope with this task.
Most often, VKontakte group leaders use a graphic menu. To create such a menu, you must have knowledge of wiki markup, as well as have templates (images with buttons), or create them yourself in graphic editors.
So, the first thing we need is to enable this function:
- Go to "Community Management".
- On the right, select Sections.
- Find the line "Materials" and make them limited.
- Save your changes. After completing the steps, the “Latest News” section will appear on the main page.
Now you can proceed to installing the menu itself:
- Click the "Edit" button on the latest news.
- Next, a text editor will open. First of all, you need to upload a photo. Click on the appropriate button and select files from your computer.
- Next, click on each image and check its settings. The first size should be 610 pixels - this is the width of the menu.
- Next, switch to text editing mode.
- All images will look like commands (as in the screenshot).
- To get rid of spaces between images, replace "noborder" with "nopadding".
- Next, you need to make all the pictures clickable. To do this, add a link (to which the user will be taken after clicking) after the “|” sign.
- Save your changes.
You should end up with something similar to this:
It is also worth noting that the functionality of wiki markup is not limited to images alone. There are many possibilities (commands) for processing text and other media files. And with the help of these commands, similar to the menu, a landing page is created.
In other words, the menu is part of the landing page, which can be continued using both text and images. Here you should already proceed from your preferences.
An example of a landing page (it is very long, so only part of it is shown):
Everything above the table is pictures. It looks very good, and it seems as if the text is written separately, but it is only part of the image.
Where to get the cover image
- Download ready-made cover templates and customize them to your liking, but to do this you need to have at least basic knowledge of Photoshop, because they are in psd format. VKontakte is full of such cover distribution groups, just search for them.
- Find a picture of the required size in Yandex pictures. To do this, set the desired size and color in the search parameters. If the picture reveals the topic, you can upload it that way.
Search for a header image in Yandex- Edit the cover in the paint editor. You can open the downloaded picture in Paint and write the name, phone number, etc. Paint is a built-in graphics editor found in every Windows. In Windows 10, you can simply open it through search.
Paint editor in windows 10
Signing the banner in painte - Make it yourself in Photoshop. This way you can make a really high-quality cover. But in addition to having the skills to work in it, you also need to develop artistic taste. And this is no longer very fast.
- Can be ordered. If you are not interested in design, and you need a good cover and quickly, it is better to pay a designer and spend the saved time on developing your group. The design of the group can be ordered on this website, write in the feedback form in the Contacts section at the top.
From phone
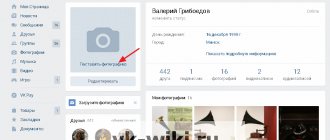
It is worth noting that you can add a cover to an album only from those photos that are added to the album.
Therefore, if you want to make some special cover, then take care of this in advance - add the necessary photo to the album. So, let's add a new cover to our album. To do this, we will use the following instructions:
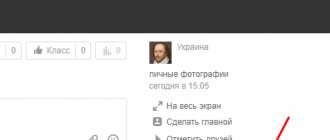
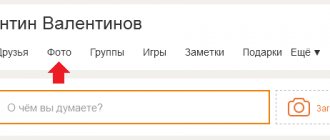
- Launch the VKontakte mobile application and go to your profile, from there open the “ Photos ” section.
- Next, open the album we need and select a photo in it that will take the place of the cover.
- Then in the upper right corner click on the button in the form of an ellipsis.
- In the menu that appears, select the “ Edit ” option.
- After this, the menu we need appears in front of us - select the “ Set as album cover ” button in it.
This way you can change the cover of your albums an unlimited number of times. On a computer, the procedure for adding a cover looks a little different, but we will talk about this in the next section.
Where to download the cover file
- Open the Management section in the group menu.
Management section in the VK group menu - Click the Download link in the Community Cover bar.
Download VK cover - In the window that opens, click Select file and specify your cover file.
Selecting a file for the VK cover - Check how it loaded, if everything is OK, click Save and continue.
I specifically uploaded a yellow blank cover to demonstrate. So everything is ok with her, that’s what she looks like)) - If a message appears about a successful download, then everything is OK, you can go see what happened.
Cover uploaded successfully - This is what a loaded cover in a group looks like
Finished cover
How to set the cover for a group in Odnoklassniki on a computer?
First, in the desktop version of the site, you just need to go to the community page itself in Odnoklassniki, after which you need to click on “Edit cover” at the top of this page. After this, a new list of additional options will open, from which you need to select the appropriate option:
- “Upload new” if the community administrator wants to add a picture from his computer;
- “Select from photos” to add one of the pictures that have already been uploaded to the community;
- The “Cover Settings” function allows you to upload up to 10 different pictures at once, which will replace each other in the community header, moving with the slider;
- The “Mobile Cover” function allows you to set a special type of cover that will be optimized for mobile devices, that is, the image must have a vertical positioning.
Next, we will look at an example of adding a picture that has already been added to the community, so we select the second option. Adding a new picture from a computer occurs in approximately the same way.
After selecting the desired item, a new window will open in which you simply need to select one of those pictures that have already been added to this community earlier. To do this, you just need to click on the required picture.
Once the image is selected, all that remains is to set it to the correct position in the community header area. To do this, you simply need to move this picture within this area. When the position is correctly configured, all you have to do is click on “Pin” to save it in this position. By clicking on the “Cancel” button, the user can return to selecting another image to upload as the cover image.
When the new cover is installed in the community, the group administrator can click on “Edit Cover” again to, for example, change its current position or add new additional pictures. There is also the option to easily delete the community cover.
Useful tips
- To make a good cover, find out who your subscribers are, what they like: schoolchildren, students, businessmen. They all react to different colors and images. And it depends on how you design the cover whether they will subscribe to you or not.
- Read the article on how to promote a VKontakte group from A to Z, because the cover is only one of the steps in promotion. Are you creating a group to get more subscribers?
- If you are just thinking about creating a group, then find out how to create it and design it correctly.
- Find out what kind of posts there are and how to publish them, because publications are the main channel of communication with subscribers and keeping them in the group.
How to tag a user in a post
There are two ways to mention a person in a post:
1 – just copy the link to his page and paste it into the post. In this case, he will not know about it until he sees this recording himself.
2 – create an active link to your profile. To do this, you need to open any post on the user’s wall by clicking on the date of publication/repost and copy the numbers from the address bar following the word “wall”. If there are no posts on the wall, then you can open any photo and copy the numbers after the word “photo” from the address bar. This way we will get its id. Now we create a new post, put *, after it we insert the resulting id and after it we enter the person’s name in brackets. The final result looks like this: * id 11111 (Name), where “11111” is the user id address. We publish a post and immediately receive the result in the form of a person’s name with an active link to his page, and this user, in turn, receives notifications about the publication of a post mentioning him.
How to make bold text in a VKontakte post
Not in the post itself. Today such a possibility does not exist. Bold font can only be used when designing wiki pages. If you are the owner of a group and not a public page, you can use bold text to design the main news. To do this, you need to go to the community settings and make “Materials” open. After this, the “Latest News” tab will appear at the top of the main page, which is designed in wiki markup mode and allows you to attach photo and video materials and change the font type. But this opportunity is available only for groups and only for one top post.