Create a VKontakte group: avoid spam
Experts recommend that those who create a VKontakte group close the wall, but at the same time be sure to provide visitors with the opportunity to comment on published posts. You need to visit your community not just every day, but several times a day in order to quickly remove spam, if any. Remember: you don't want spam and you should remove it as soon as possible - the sooner the better!
As for unwanted users who spam your page, be sure to blacklist them for at least a couple of weeks or a month. You can also submit a complaint on the page (there is a special button for this) so that the administration of the social network freezes it.
You need to create a group in contact
in such a way as to minimize “spam” and at the same time provide users with comfortable communication with each other. People should be able to discuss materials posted in the group. It's a good idea to let visitors create their own discussion topics. But again, be careful not to spam discussions.
Try limiting the ability to create albums, but leave the ability to add photos to albums that have already been created. The status of photo albums should be regularly monitored to ensure there is no spam or to remove it in a timely manner.
Creating a VKontakte group
The question of how to open a VKontakte group is technically quite easy to solve. There is no need for any special knowledge or skills (for example, like c). So, you are already registered on VKontakte, which means you have your own personal page.
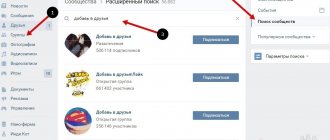
To create your own group, select “My Groups” in the side menu of your page (number 1 in Fig. 1). The "Popular Communities" ad block appears with an offer to subscribe, as well as a list of all the communities you are a member of. You need to click on the “Create a community” button (number 2 in Fig. 1), located in the upper right corner.
Figure: 1. To open a VKontakte group, on our page, click the “Create Community” button.
Figure: 2. Enter the group name, select the type and click the “Create Community” button
We confirm the creation of our group by clicking on the “Create community” button (number 3 in Fig. 2). A page with settings for this group will open.
Group settings
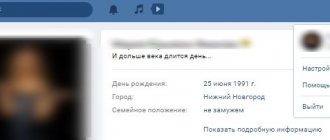
The first tab with settings is called “Information” (number 1 in Fig. 3). All the main community management options are located here.
In the “Name” item (number 2 in Fig. 3), you can edit the name of the newly created group.
Under Page Address, you can change the community URL if you wish. To do this, instead of the standard URL in the club82063972 format, specify some simpler and more memorable address, for example, superbooks. If the selected URL is already taken, you will see the corresponding message.
In the “Community Description” item (number 4 in Fig. 3), you can place a small text description. They usually talk about what the group is doing.
Below we select a topic from the list that will open after clicking on the small black triangle - it is marked with number 5 in Fig. 3. We indicate your site, of course, if it exists (number 6 in Fig. 3). You can even specify your location using the corresponding menu item (number 7 in Fig. 3).
- wall settings (number 8 in Fig. 3),
- photographs (number 9 in Fig. 3),
- video and audio recordings,
- documentation,
- materials and
- discussions (number 10 in Fig. 3).
Each of these categories can be disabled, made public, or limited. For example, when turned off, no one can write anything on the wall. If you turn off photos and videos, no one will be able to add them.
In limited conditions
A specific category can only be changed by a community administrator or moderator. For example, only administrators and moderators can write on the wall, only administrators and moderators can add audio and video recordings.
Open
categories can be changed by ordinary users. Users have the ability to add comments to the wall, photos to albums, videos, etc.
In the last paragraph “Group Type” (number 11 in Fig. 3), you can set the format for new members to join the community. All users without exception can join an open group. To a closed group - only after agreement with the administrator or moderator. As for the private group, you can get here only by invitation of one of the administrators.
In Fig. 3 (numbers 8-11) shows the default group settings, that is, such settings are offered automatically. You can choose to accept and adjust your choices as described above.
At the end, do not forget to approve your changes by clicking on the “Save” button (number 12 in Fig. 3).
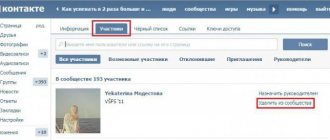
The second tab in the community settings is called “ Members”
"(next to number 1 in Fig. 3). Here you can view a list of users who are currently in your group. Each user can be removed from the group or appointed as a leader (the person will have moderator rights).
The third tab is called Blacklist
". Users blocked from your community for any reason (insults towards other members, spam, etc.) are posted here.
How to make a link in a group
Figure: 4 Create a link in your group
Figure: 5 Enter the URL of a link to a VKontakte group or an external site.
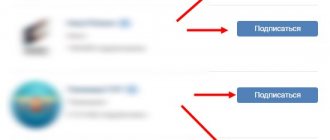
I entered the address of a free course from my site. Then click the “Add link” button (number 2 in Fig. 5).
Figure : 6 Enter link text
In the window marked 1 in Fig. 6 “Enter Link Text”, click and enter your link text. For example, I entered Computer Literacy for Beginners in 30 Days. After that, click the “Add” button (number 2 in Fig. 6). The resulting link looks like shown in Fig. 4, number 2..
How to select the author of a message in a group?
The sending settings menu will appear, where you can select on behalf of whom the message will be published:
- On my behalf or
- On behalf of the community.
If you are about the message will be published on behalf of the group.
Figure: 7. Selecting an author when publishing in a group
I invite you to the group "Computer literacy with hope"
I am glad to invite everyone to join the new VK public.
VKontakte is a well-known social network. People of different ages, professions, and interests communicate here. Among them are your target visitors, with whom you can and even need to work. Your own VKontakte group is an excellent addition to the site, and sometimes even a complete replacement.
What does the name mean and how important is it?
The name is placed in the header of each association. It talks about its main topic and piques the initial interest of future subscribers.
Sometimes after creating a community, the administrator comes to the conclusion that it is necessary to change its name.
Why change the names of VKontakte groups?
- The name affects the rating. If a social network user searches for keywords for a community and cannot find it, then most likely the keywords were not used in the name.
- The site address has changed or a new administrator has appeared (the group was sold, transferred to another administrator, the main domain of the site has changed) - therefore, it is necessary to change the name in VK.
- The community ranks well for low-frequency, and there was a need to promote it with a relatively high frequency (for example, the community is visible in the search for “cheap women’s clothing”, the administrator wants to rank it for the query “women’s clothing”).
Some also refer to this name as the web address of the community on the Internet, where the visitor directly enters the association through a browser, and in searches it appears at this address. The standard address looks like this:
To improve brand perception and consistency, it is recommended to change this web address to, for example, the following:
In this example, the address matches the official name of the company, site, and community. It looks more visual and is easier to remember.
Whatever the reason for changing the name, let's see how it can be done.
Setup Instructions
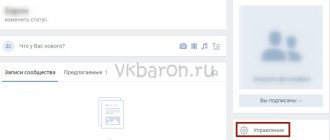
Now it's time to find out exactly how to create a community in VKontakte.
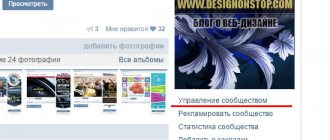
and what actions need to be taken to achieve this. Start by logging into your group and click the "Manage Community" button (located under your group avatar). You will see the "Information" tab - this is the main tab where the following settings are present:
- Name. You can change the name of your community at any time, but don't do it often.
- Page address. You don't need a simple ID number; It’s better to come up with a beautiful, original and concise message for the group. For example https://vk.com/komputery_internet instead of https://vk.com/club12345678.
- Description of the group. if you have a community in your contact settings
with a description, this will attract more visitors to it. You need to try to briefly describe your “brainchild” and tell “in a nutshell” what it is about. Then visitors will be able to immediately understand exactly where they are. - Group theme. Choose a topic for your community. To do this, click the field and select the appropriate item in the menu that appears after this. Of course, you can leave this field empty, but still choosing a topic will not be superfluous.
- Web site. If your community has an external website, enter the URL here. By doing this, you will not only interest visitors even more and expand your target audience, but also increase traffic to the resource, which will certainly have a positive impact on its work and promotion.
- Location. This function becomes especially relevant when the VKontakte group is dedicated to a locality, attractions, a specific establishment located only in one city, and so on.
- Wall. You need to decide what your wall will be like. This can be: off (not recommended), open, restricted and closed.
- Export to Twitter. In principle, this parameter is optional, but it is extremely convenient for those “group owners” who have a promoted Twitter account. If you don't have one, you don't need to set it up.
- Video recordings. Photos. Documentation. Materials. Discussions. All these functions can be: open, disabled, limited. Select an option based on the recommendations and tips above.
- Group type. This option can easily be called privacy settings, and therefore it is very important. Pay special attention to this setting. The fact is that your community can be of three types: private, closed, open. It is recommended to choose open groups, but this is not always good. For example, if a community is intended for people aged 18+, it must be closed, otherwise your group may be blocked.
Above are the most basic community settings. available to you. But there are other tabs containing “Links”, “List of Group Members” and “Black List”. With these tabs, everything should be clear and understandable to you: you will simply use them as needed.
As for the basic settings, try not to neglect them and spend up to half an hour to create a group on a social network
exactly as you see fit. and how this will be best for its successful development. But do not forget that even with optimal settings, the VKontakte group requires your constant monitoring.
Hello, friends!
In today's article I will talk about the settings of the VKontakte group. Where to find them and what needs to be indicated in them in order to promote them on VK more effectively. In general, the information will definitely be useful, so read below.