If you need to flip a table in Word
It’s not easy to flip a table 180 or 45 degrees in a text editor, but it’s possible to do it thanks to the versatility of Microsoft Word. Not everyone knows the “Inscription” button for Word 2007, 2010 and “Text field” for Word 2013 and 2021, it will be a salvation in such a situation. To turn the table over, we take the following steps:
- Find “Inscription” in the “Insert” tab and select “Simple Inscription”;
- Delete the entire text fragment in the frame;
- The next steps are “Insert” – “Table” and indicate the number of cells.
- Fill in all the cells.
- A “Green Circle” will appear above the table; double-click on it, while holding the mouse, and move it left or right. The rotation angle can be any, but if you hold down the “Shift” button, the turns will be carried out step by step.
- To remove the extra frame around the table, click on the thick line under the green button and press the right mouse button, then select “Format Shape”.
- In the new window that opens, in the “Fill” section you need to specify “No fill”. In the “Line Color” section – “No lines”.
- Click “Close” and you’re done! Making upside down text was not difficult.
If you need to expand text in cells, then use the tips at the beginning of this article.
Method 4 – Rotate the line
If you just want to turn the line upside down rather than rotating the text at any angle, you can use a shape again.
Follow the instructions:
- Select the shape with the text entered and go to the “Layout” tab of the program;
- Next, select the “Size” field and enter the degree of rotation in the “Rotation” line. To make the line appear upside down, you need to set it to 180 degrees;
- To remove the outline of a text field, right-click on the shape and click on “Format Shape” - “Remove Outline”.
As a result, the text will be displayed as shown below. You can write text next to an existing block
All of the steps described above can be applied to WordArt style objects.
Flip text in Word 2003 - 2007
How to write text in paint
In versions of the Microsoft office suite from 2003 to 2007, the text field is created slightly differently than in the cases discussed above. To be more precise, it first needs to be converted into an image, and only then can it be rotated (rotated and flipped) using the same algorithm as in the cases discussed above.
- So, go to the “Insert” tab, click on the “Inscription” button, and then select “Draw inscription” from the drop-down menu.
Enter the required text in the text field that appears or paste it. If the text does not fit, resize the field by stretching it beyond the edges. If desired, format the text and give it the desired appearance.
Having finalized the text, cut it (Ctrl+X or the “Cut” command in the “Home” tab).
Insert a text field, but under no circumstances use hotkeys or a standard command to do this. In the “Home” tab, click the “Paste” button and select “Paste Special” from the menu that appears.
Having done this, in the dialog box that opens, select the desired image format (it is better to choose PNG) and click “OK”, then select the insertion type “As bitmap” and click “OK” again - the text will be inserted into the document as an image.
Rotate or flip the text, or rather the image within which it is contained, by choosing one of the convenient and/or required options:
- Click on the round arrow above the image and drag it, rotating the image with the text, then click outside the shape.
In the "Format" tab ("Arrange" group), click the "Rotate" button and select the desired value (flip is "Flip from top to bottom") from the drop-down menu, or specify your own parameters by selecting "Other rotation options."
The disadvantage of this method is not only the inconvenience of its implementation, but also the fact that the inscription converted into a graphic drawing cannot be edited for obvious reasons. That is, you must first write down the text correctly, format it as you see fit, and only after that start turning or turning it over.
Method 2: Using a text field
Text in Word can also be flipped using a text field. In general, the process is practically no different from the previous one, but there are several nuances, which we will discuss in more detail below.
Just like last time, you first need to open the Text Box tool. To do this, in the “Insert” tab, click on the button of the same name. By the way, it is located in the “Text” tool group. Select one of the templates from the menu that appears. It is recommended to use the very first one, since there is no pre-formatting in it.
After clicking on the template, a text field will appear on the sheet containing the text. It needs to be replaced with yours, so feel free to remove and insert yours.
After this, you can begin to change direction. Click the Text Direction button on the toolbar and select an orientation from the menu. By the way, the text can be rotated to any angle. To do this, you need to hold LMB on the round arrow indicator located above the text field and rotate it with the mouse.
As in the previous method, the size of the text field may not fit the length of the written text, so you need to stretch it. This is done in exactly the same way: hold LMB on one of the borders and stretch the edges of the field.
To remove borders, you need to click the “Shape Outline” button in the “Format” tab and then click “No Outline”.
Reversing book titles
The host invites guests to guess the “upside down” names of famous books:
- A pot of soup (a pot of porridge)
- Radish (Turnip)
- Hen - iron beak (Cockerel - golden comb)
- Cute Swan (The Ugly Duckling)
- Blue baseball cap or Orange handkerchief (Red Riding Hood)
- Square (Kolobok)
- Mouse in Sandals (Puss in Boots)
- Homebody Tadpole (Traveller Frog)
- Dog Hotel (Cat House)
- Rainy King (Snow Queen)
- Black Rain and 2 Giants (Snow White and 7 Dwarfs)
- Straight-backed Lamb (Humpbacked Horse)
- The Cowardly Seamstress (The Brave Little Tailor)
- Toad Slave (Frog Princess)
- At the crawfish's request (at the pike's command)
- Silly Erosinya (Elena the Wise)
- Zharilko (Morozko)
- Prince in a Pumpkin (Princess and the Pea)
- Copper master key (Golden key)
- The Waking Beast (Sleeping Beauty)
- Giant-ears (Dwarf-nose)
- Sazhechka (Cinderella)
- Dressed Citizen (Naked King)
- Gray blade of grass (Scarlet flower)
- Fat Man Vulnerable (Koschei the Immortal)
- Kilometer (Thumbelina)
- Jimmy Short Sock (Pippi Long Stocking)
- Thomson, who works in the basement (Carlson, who lives on the roof)
- One-color cockerel (Hen Ryaba)
- Palace (Teremok)
- Patient Oyzdorov (Doctor Aibolit)
- Pyotr Krestyanich and the white hare (Ivan Tsarevich and the gray wolf)
- The Tale of a Found Clock (The Tale of Lost Time)
- Prince-Laughter (Princess-Nesmeyana)
- Irinushka the smart girl (Ivanushka the fool)
- London Dancers (Bremen Town Musicians)
- A story about a living peasant woman with 14 weaklings (The Tale of the Dead Princess and the Seven Knights)
- Znayka under the Earth (Dunno on the Moon)
- Directly by shadow in 10 nights (Around the world in 80 days)
- Lettuce garden (Cherry orchard)
- Trinket Continent (Treasure Island)
- Brought by the calm (Gone with the wind)
- Happiness is in stupidity (Woe from Wit)
- Law and encouragement (Crime and punishment)
- Purple sideburns (Bluebeard)
- Pedestrian with legs (Headless Horseman)
- Mothers and parents (Fathers and children)
- Living bodies (Dead souls)
- Loud Volga (Quiet Don)
- Cat's liver (Dog's heart)
- Grandmother and the Desert (The Old Man and the Sea)
- Two million kilometers above the earth (Twenty thousand leagues under the sea)
How to write under a line in small letters in Word
Remember, remember
One of the new products on the memory improvement market is a method that invites you to once again plunge into the past day. Before going to bed, remember what happened to you over the past 12 hours. Try not to miss a single detail, what thoughts you woke up with, what you saw in the morning on the way to the office or university, what you thought about, who you met, what you remember - a beautiful sky, a strange person at a bus stop, a lazily sleeping cat on the fence. Step by step, go through the past day again. Repeat this exercise every day, and after four weeks, according to scientists, you will feel the result. By the way, this will not only improve memory, but also develop imagination and become an excellent preventive measure against insomnia.
How to make text vertical
You can make a word or an entire sentence vertical. Although this option is not used as often, it is useful when creating tables, charts, and graphs. Below are a few ways to get what you want
Rotate using table
- Go to the “Insert” tab and select “Table”. If you planned to use upside down text in a table, create the required number of cells. If it is placed separately, it is enough to form one cell.
- Write and highlight text in a cell, then right-click on it to bring up the menu as shown below. Select “Text Direction”.
- In the window that opens, select orientation—the direction in which the text will rotate.
- Adjust the cell area. Initially, the text will be grouped so that it fits entirely. To make a phrase of several words appear in one or several lines, the cell can be stretched.
- Remove table borders if they are not needed. To do this, select the entire table and right-click on it. From the menu that appears, select “Borders and Shading.”
- To remove visible borders, select “None”.
Result:
Using SmartArt
We looked at how to use SmartArt in the section on rotating text. Let's study one more technique.
- Create a SmartArt object as described above and fill it with text. Right-click on the object and select “Format Shape” from the menu that appears.
- Click the “Inscription” item in the window and set the text direction up or down.
How to write text vertically in a column
Unfortunately, Word developers did not provide tools for creating vertical inscriptions. Nevertheless, there is a possibility to obtain such an effect. To do this you need:
- write each letter in a separate paragraph;
- write text in a table cell and narrow its borders to form a column.
The latter option is more convenient, as it allows you to place several columns of words on a sheet.
The considered methods for rotating text in Word are applicable to all versions of this program, starting from 2007. Inverted text retains all its original properties, so you can do with it the same as with the rest of the contents of the document. For example, change the font, color, size, etc.
Up and down button for a site like on VKontakte. Code
Now let’s move directly to the code itself, there’s nothing complicated here. To make it clearer, I commented in detail on almost every line. First the css:
.in_top{ position: fixed; left: 0px; top: 0px; width: 100px; height: 100%; opacity: 0.5; filter: alpha(opacity=50); cursor: pointer; display: none; } .in_top:hover{ background-color: #E1E7ED; opacity: 1; filter: alpha(opacity=100); } .in_top span{ display: block; width: 100px; margin-top: 10px; text-align: center; color: #45688E; font-weight: bold; }
Now let’s write the js code for the button to work:
And all that remains is a piece of html, the button itself:
That's all. Finally, I’ll attach a link to the source - here it is.
How can you reverse text in Word?
It would seem that there is nothing easier than using the Word text editor. You can write something in it, and then make it beautiful: play with fonts, colors, drawings. However, sometimes tasks appear that baffle a person.
For example, how to reverse text in Word? Of course, if you need it to be located “sideways” on the sheet, then you can simply change the orientation of the sheet itself. But there are situations when you need to turn only part of what is written upside down.
In this case, you should use slightly different tools.
Rotate text using tables
There is no direct way to flip, you can’t click on the “Rotate” button and that’s it. But there are several other tools, and one of them is tables. But here, too, two separate, but simple and almost identical solutions can be distinguished.
The first is suitable for cases when some words have already been typed in Word. In order to make a rotation, you need to select the “Insert” tab on the toolbar, go to the “Table” section and click “Draw Table”. In this case, the cursor will take the form of a pencil, with which you can grab the area to be transformed. Thus, these words will be inside the cell. At the same time, an additional “Layout” tab will appear in the toolbar at the top right. All that remains is to go there and select “Text Direction”, which should be in the document. Next, get rid of the outline. To do this, go to the “Designer” and in the “Styles”, “Borders” column, select “No borders”. You can also select a ready-made phrase, go to “Tables”, click “Convert...”, and then continue according to the same scenario.
However, there is another way. If the author of the document initially knows that some of the words should be located in an unusual position, then you can first create a matrix and then enter these words there. Further actions are exactly the same as in the previous paragraph.
Rotate text using captions
This is the second method of transforming segments, but it cannot be called radically different from the first. You need to select the “Inscription” section on the “Insert” tab, create it and enter the words in the field that appears. An additional “Format” tab will also appear, where the same “Text Direction” is located.
You can also select the finished segment, then click “Create an inscription”, and it will automatically be converted into it, as in the section with tables. Next, you should again turn to the boundaries and remove them.
As a result, you can change the direction of text in Word like this:
- select a section, convert it to a table;
- draw a table around the text;
- enter the phrase into the prepared cell;
- create an inscription, enter words;
- select a segment and create an inscription.
Rotate text 180 degrees
It is necessary to pay attention to the fact that with the help of these means words are rotated only 90 or 270 degrees. But there are rare cases when a small passage should be upside down (those who read riddles in newspapers know that the answers are often located side by side, only “upside down” to make it harder to read)
This is also quite possible to do in Word.
But there are rare cases when a small passage should stand upside down (those who read riddles in newspapers know that the answers are often located side by side, only “upside down” to make it more difficult to read). This is also quite possible to do in Word.
You need to carry out exactly the same operations with tables or inscriptions, and then pay attention to the small green circle above the created diagram. By clicking on it with the left mouse button, you can scroll the text and even make it diagonal
How to write text at any angle and backwards in Word
Today's conversation is, to some extent, a continuation of the topic “Vertical text”.
In addition to text written horizontally and vertically, we may need to write text, for example, at a certain angle, or even make it “lying” or tilted. We will talk about all this today. The tool “Draw an inscription” will help us. Let’s open the “Insert” tab of the top menu and focus our attention on only the two functions it contains: “Shapes” and “Inscription”:
Both of these functionalities contain the same tool (option) “Draw an inscription”. Let’s expand on the contents of the “Shapes” functionality and see where the “Draw Label” tool is located:
So, the “Draw Lettering” tool is located in the “Basic Shapes” section of the shape set. If we once used this tool or some shape, then these shapes are reflected in the top section, with the name “Last used shapes”.
Now, without leaving the “Insert” tab, move the mouse cursor to its “Text” section and click the “Inscription” icon and in the window that opens, pay attention to the “Draw inscription” option:
This is still the same instrument. So, we have two options for activating the tool, no matter which way we go. Confirmation of the activity of the “Draw Label” tool will be a modification of the cursor - it will turn into a crosshair of two small lines:
By clicking and holding the left mouse button, we will create a field for text - draw a rectangle. The cursor will automatically be inside the rectangle, and we can start entering text:
So, the text entry is completed, you can start rotating it:
Last time, when we talked about “vertical text,” we rotated the text by grabbing the top green marker. Today we will act differently. I'll add two more lines of text to the box as an example.
The moment we finished drawing the field for the future text and released the left mouse button, significant changes occurred in the top menu. Completely independently (automatic mode), the options of the “Insert” tab were replaced by other options of the other “Format” tab:
But let's take a moment to rotate the text and pay attention to the field within which we place the text. The visibility of the field should not bother us, since we can make it invisible.
Why do we need to make the field invisible? And so that if text is written on a background with a color other than white, the working area of the field is not visible.
So, let's make the field transparent using some of the options in the top menu's Format tab. Our task is to make the field truly transparent (now it is white) and remove its outline.
Let's start by removing the outline. To do this, expand the contents of the “Shape Outline” option and select the “No Outline” option from the list:
Now let’s make the field transparent, that is, reduce the white fill to zero. To do this, select the “Shape Fill” option and in the list of options that opens, select the “No fill” option:
This option may not always suit us, for the reason that “no fill” means the absence of a fill with a color other than white, as well as a gradient fill and a texture fill. That is, the field remained white as it was. In this particular case, this is an unnecessary action. Now I will place a triangle under the text, and we will make sure of this:
In order for the field to become truly transparent, we need to make other settings, and we will now make these same settings.
If the text field is not selected, then click in the text area to select it (the field is captured by markers). By left-clicking on the arrow in the lower right corner of the “Shape Styles” section of the “Format” tab, we will expand the additional settings window called “Shape Format”:
This window displays the settings that the field currently has. The field is filled with a solid white fill of 100% because the transparency level is 0%:
In order for the field to become completely transparent, we need to move the transparency slider to the right until a value equal to 100% appears in the window line. If we move the slider smoothly, we can observe how the text field becomes more and more transparent:
Having set the transparency level to 100%, click the “Close” button:
And here is the result of our actions:
Now let's move on to text rotation, as well as its tilt.
In order to rotate the text the way we want, we must, without leaving or collapsing the “Format” tab of the top menu, turn to the “Shape Effects” option:
And in the list of actions that opens, select the item “Rotate a volumetric figure”:
A new detailing window will open for us, where we will select the item “Rotation parameters for a volumetric figure”:
And now, finally, we get to the settings window:
In the lines where we currently see zero values for the text rotation angles along the X, Y, Z axes, we set the desired values by observing how the text rotates or tilts. We can set angles along all three coordinate axes, two or one. Or we can use the icons with blue arrows located in two columns to the right of the lines for entering numbers (tilt and rotation values). All we have to do is left-click on these very icons and look at what happens to the text:
How can you flip text vertically in Word?
Word users do not always prefer to use standard text writing settings made in a horizontal position. When composing certain documents and all kinds of texts, it is often necessary to use vertical text layout, but not everyone knows how this can be done using the standard tools of this program.
In fact, there is nothing difficult about ensuring that text is positioned vertically on a particular page. Standard Word tools make it quite easy to carry out this operation even for beginners - you just need to remember how to do it.
How to do it?
To begin, select the Insert tab in the top menu, and then click on Caption. In a new window, run “Draw Label” and create a field in the document you are using.
On the left side there will be a button in which you can set the direction of the text. In particular, this button also provides the ability to specify the vertical writing of characters in this area.
This method is often the most convenient, since it allows you to write vertically not throughout the entire text, but only in a certain area, which is often what users of this program require.
Another way to write this is to use standard tables. To do this, you will need to go to the Insert section, but click on the Table tab.
Next, you will need to specify the table parameters that interest you at the moment, then select it and right-click.
In the tab that opens, there will be a “Text Direction” column, and a window will open in which you can select the horizontal or vertical arrangement of the text, as well as its direction.
After this procedure is completed, you will need to get rid of the outlines of the table itself. To do this, select the table and go to the Home tab. Above the “Paragraph” inscription on the right there is a special icon responsible for table settings; after clicking on it, you will need to select the “No border” item.
Method 5 – Using SmartArt
How to write vertically in Word - algorithms and options
SmartArt is the basis for creating infographics with ready-made templates. The function first appeared in MS Word 2007.
With Smart Art you can create lists, diagrams, diagrams, matrices, pyramids, hierarchies, cycles and many other objects.
Text in SmartArt blocks can also be flipped. To do this, open the “Insert” menu item and click on the add infographics button.
The categories are displayed on the left side of the window that opens, and on the right side is a list of available designs. Select the item you like and click OK.
Then, on the document page, select the cell whose text layout you want to edit. Click on it with the right mouse button.
Next, select "Animation Options":
In the new window, go to the “Inscription” tab and find the “Text Direction” line on the right.
There are three rotation options available - Horizontal, 90 degrees and 270 degrees.
How to write vertically in Word: setting direction using a table (first method)
Those who know how to work with tables in Word will be able to understand the concept of this method. Using only one table cell, the user can set the desired direction of the text, as well as change it at will.
- Go to “Insert” and click on the “Table” button.
- In the menu that opens, select one cell.
- Holding down the left button of the computer mouse, drag the lower right corner of the outline and thus set the desired size.
- Type manually from the keyboard or paste the text you need from the clipboard.
- By right-clicking, we call up the context menu, where we go to “Text Direction”.
- A window will appear in which you need to set the desired direction.
- Confirm the action by clicking “Ok”.
- The text display will change.
- Next, we change the cell shape and size by pulling it out by the markers, giving it the appropriate position.
- If necessary, deactivate the cell outline display.
Using the right mouse click, activate the context menu and select "Borders".
In the next window, click on the “No borders” item.
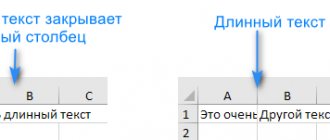
How to sum cells in excel: there are two ways
After this, the borders on the screen will not be visible, and the text will retain the specified direction.
Solving the problem using the “Text” section
The program has many tabs on the top panel, and there are even more sections in them. Using one special section, it is possible to change the direction of the text.
- Through the “Insert” tab, you need to click on “Text field” in the “Text” section.
- The following menu has many text area templates and layouts. Choose any option you like.
- A field with standard text inside will appear on the work area. We delete it, we don't need it.
- We enter the required text manually or copy it from another source and paste it into the specified field.
- If you click with the cursor along the contours of the area, markers will appear, which you can drag to change the size.
- Also, additional virtual devices will be displayed in the panel at the top for editing purposes in the “Format” tab.
- In the “Text” section, click on “Text Direction”.
- We select rotation at certain angles presented in the displayed menu. In our case, we rotate it either 90 degrees to place the text from top to bottom, or 270 degrees to place the text from bottom to top.
- It is possible to change the size of the field.
- Then we delete the outline of the frame of the area in which the text is located.
In the “Shape Styles” section, find “Shape Outline” and click the button.
From the options offered to us, select “No contour”.
- By clicking outside the text area, we cancel the active operating mode.
Entering text in a column
If suddenly the previous methods did not help you, do not worry. There is another, simplest way to arrange what is written on a sheet of document in Word vertically.
All you have to do is type the words in a column. This way, you can achieve vertical display of text, but individual letters will still be positioned horizontally.
The previous methods do not allow achieving this result.
- Enter each letter of the words one by one, pressing “Enter” after each. If the text is saved on the clipboard, and you simply placed it on the entire document sheet, then you need to place the cursor in the spaces between each pair of letters and press the “Enter” button on the keyboard. This way you can wrap each letter on a new line. Where there should be a space in the text, “Enter” must be pressed 2 times.
How to draw an arrow in Word: simple instructions
- Typically, in Word, all words or letters on a new line are displayed in capitals. If you need all lowercase letters except the first letter of the text, you need to select all of them with the cursor, and then press the key combination Shift+F on the keyboard. The letters will change.
- You can change the spacing between letters:
First, select what we typed, then select “Spacing” in the “Paragraph” section of the “Home” tab.
From the menu that appears, select the default options or click on the “Other interval options” item.
Enter your values in the “Interval” field.
Confirm the action by clicking “Ok”.
- The spacing between letters will change: the spacing will become larger or smaller depending on the values entered.
Here are all the instructions on how to write vertical text in Word. As you can see, there is nothing complicated in the process. There are even several processes described here, so you can choose the most convenient option. Feel free to ask questions.
That's all! Bye everyone!
View all posts by admin
How to write upside down?
To decorate your social media account with outlandish inverted text, we recommend that readers turn to simple and convenient services that you will find in large numbers on the Internet. You will find some of them in the next subheading.
Working with “flippers” is simple:
- Paste or type the desired fragment into the “Normal text” field.
- In the “Inverted” section, the upside down option is displayed after a while or instantly.
- Select the inverted text with your mouse or finger and copy.
- Then you can paste it wherever you want - into a Twitter post, a Word document, a message in Viber, onto an image in a video editor, Photoshop, or their mobile versions.
How else to write in upside down letters? You can assemble the desired word using the symbols listed below:
ʁ o.ı є ƍ qm Һ ǹ х ȸ ʎ ɯ ɔ du o n wv ʞ and ε z ǝ ɓ ɹ ʚ ƍ ɐ
z ʎ xn ʇ s ɹ ᕹ dou ɯ l ʞ ɾ ı ɥ ƃ ɟ ǝ p ɔ q ɐ
Trust your smartphone
Contrary to popular belief, reminders in smartphones, like stickers, do not improve memory, but only spoil it. But for modern devices there are also special applications that will help you train it. For example, the Ankidroid program. It is designed to develop memory through constant repetition. The teaching principle is simple - Ankidroid shows you the front side of a card on which some information will be written. The key to the contents is on the reverse side. By sequentially going through the cards and associating key data, you will have to remember what is on the back of the card. By the way, the main advantage is that you have access to not only template maps from the Internet, but also those that you created yourself.
Working with the block
Actually, two other methods of rotating text are implemented in the “Insert” tab, but they are already located in the “Text” section.
- Select “Inscription” > next or “Simple inscription” or “Drawn inscription”. We get a block into which the text fits. (By the way, the same block can be found in the “Insert” menu > “Illustrations” > “Shapes” > “Basic Shapes” > “Table”).
- We mark our inscription, and now go to the “Format” > “Text” tab and find the treasured icon with the rotation option, which allows you to position it vertically.
- In the latest versions of Word, a cool opportunity has appeared to rotate the text simply along with the block by clicking on it and dragging the mouse on the green circle attached to the top of the frame, and this option makes it possible to position its contents at any angle to the vertical (or horizontal) axis of the document and even upside down.
You can do this with a given accuracy by calling the “Additional layout parameters...” > tab “Size” in the context menu of the block. There you can specify a specific angle of inclination of the block.
The described methods for rotating text imply its location in a separate block or table, which by default has a frame. You can also remove it in the additional settings of each specific object.
How to Flip Text Vertically in Word Using Text Boxes
The second method of flipping text is a little more complicated. In order to use this method, you need to open the “Insert” tab, click on the “Shapes” button and select “Inscription”.
After this, you need to use the mouse to specify the size of the inscription that you want to insert into the Word document. As a result, you will have a frame within which you can enter text.
Enter the text you want into the frame and go to the Format tab. Here you can find the “Text Direction” button, with which you can flip the text 90 or 270 degrees.
The result is a frame with upside-down text that can be placed anywhere in the document.
It should be noted that the inscription with text can be turned over manually. To do this, click on the green dot above the inscription and, without releasing this point, turn the inscription to the desired position.
If you hold down the SHIFT key at the same time, the inscription will be flipped only at a certain angle.
When designing a Word document, users wonder how to flip text in Word, for example, if you need to flip the text vertically, or at a certain angle. There are several ways to do this.
The word processor Word, included in the Microsoft Office suite of programs, has powerful functionality for document design in accordance with various requirements.
MS Word has a variety of functions for changing the arrangement of text in a document, including rotating text in different positions. The user only has to choose the most suitable option to complete the job.
We need to rotate the text in Word from its usual horizontal position to another position at a certain angle. For example, text must be positioned vertically in a document, or at a certain degree, or arbitrarily, as chosen by the user, with a different inclination from the horizontal.
In this article, you will find instructions on how to rotate text in Word in different ways: rotating text in a table or using a table, rotating text in a shape in different ways, rotating text in SmartArt graphics.
A universal method for different versions of Word 2003 – 2021
Some programs built into Microsoft do not change their configurations for a long time. But not Word. Buttons move, their names change, some are grouped, some disappear. You won't be able to figure it out right away. Well, at least there are fewer problems associated with the fact that one version does not open a document from another version.
But now we’re not talking about that, but about editing, or more precisely about how to rotate text in Word by 45 degrees or in any other direction.
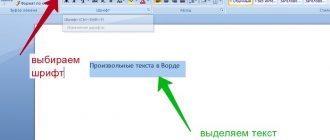
First, let's take the method used in Word 2007:
- Insert section.
- Inscription - draw.
- Select an area of the desired size in the document.
- Make an inscription.
- Format – Direction (Figure 2).
- The required value is set.
Here you can rotate not only by set degrees, but also arbitrarily, by rotating the area itself
The universal method for MS Word 2010 is no different from what works in Word 2021 and Word 2013. Since they already have a lot of functions, they did not make any special one for rotating inscriptions, since not such a large number of users need it. Therefore, only the method with a header or table will work, which will be discussed in more detail later.
Figure 2. Setting the text direction in Word
Flip part of the text
Reversing part of the text
Sometimes you need to turn over more than one word or sentence, but there is no need to completely change the orientation of the page either. Then you should use the following method.
First, set the desired text format. Afterwards, select the necessary information (one sheet or several) and go to the parameters. There, find landscape orientation and click “Apply”, but only to the selected text. Then simply click “OK” for the changes to take effect.
If you need to arrange all the text not vertically, but along the width of the page, then simply flipping the text is too time-consuming and problematic.
To save time, change the page orientation. Even if you need to place some elements in the other direction, you can always do this by changing the direction of the text.
Reverse all text in MS Word 2003 and earlier
Reverse all text
Old computers still run simple Word 2003, but even a weak processor handles office work absolutely fine. So, rotating a page in MS Word 2003 remains a pressing issue.
Usually, when you open Word, the page is configured vertically; to change this to a horizontal orientation, follow the instructions:
- In the menu, find the “File” tab.
- Go to “Options”.
- Find the “Margins” tab and then the “Orientation” line.
- There will also be a layout of pages: portrait or landscape. Moreover, portrait is the usual orientation, that is, vertical, and landscape is exactly what we need.
- Confirm the changes by clicking OK.
Reversing all text in MS Word 2007
In 2007, Word changed the design and overall functionality of the text editor. I also need the position of the page a little differently here:
- Go to the “Orientation” icon.
- Change portrait to landscape.
- Confirm the changes.
Method 2 – Using tables
In MS Word, users can create any tables and fill them not only with text, but also with graphic content.
Rotating text using tables allows you to adjust the display angle of characters to any desired angle. Table frames can always be hidden.
Follow the instructions:
- Create a table using the menu "Insert" - "Table";
- Then type text in one of the cells and select it;
- Right-click on the selected object and select “Text Direction” in the pop-up list of actions;
- The content display settings window will open. Select one of three types of rotation, check the pattern and confirm the action;
If you need to rotate text but don't need to create a table, you can always draw just one cell and then quickly remove the visibility of its borders.
To remove sign outlines, click on the upper left corner of the element. This will highlight the entire table.
Then right-click and select “Borders and Fill” from the menu.
In the border type selection tab, select “none” and apply the changes.
Using this method, you can easily rotate formulas, special characters and other elements for which you cannot apply a direction angle without a table.
Changing and correcting images in Word
Removing the background of a picture
What I didn’t expect from Word was the ability to remove the background. Of course, this is not Photoshop, but still, it works well. So, to remove the background of the picture, click Format – Change – Remove background.
An editing window will open where the program will offer its preliminary version of the image without a background.
The part that Word considered the background will be filled with color. You can control the result, for which buttons will appear on the ribbon:
- Mark areas for saving (“+” sign) – select this tool and click in those places that do not need to be deleted
- Mark areas for deletion ("-" sign) – with this tool, on the contrary, click on the areas for deletion
- Remove mark – removes your save or delete mark
- Cancel all changes – cancels all actions and returns to normal operation
- Save Changes – Applies all changes and removes the background
This is what I ended up with. Of course, not ideal, but it works great when the main pattern is smooth enough.
Artistic correction of drawings in Word
If the picture is not sharp, bright or contrasty enough, use automatic adjustment. Click on the Corrections ribbon and select one of the suggested correction options.
If none of them suits you, configure them manually. Below the gallery, click Picture Adjustment Options and use the additional menu to make fine adjustments. I won’t give any recommendations on what indicators to set, look at your image and experiment, achieve the best result, in your opinion.
Picture color settings
This is one of the most creative tools in the program. With its help, you can adjust the saturation and shades of colors, or completely recolor the image.
As often happens, Excel will offer you a gallery of finished results, but will give you the opportunity to customize it manually in the menu list:
- Other options – allows you to choose almost any color to repaint
- Set transparent color. A special pen appears on the screen, with which you can select a color in your drawing. The selected color will become transparent
- Picture color parameters – a menu opens with flexible settings for all the above parameters. Here you can achieve exactly the result you had in mind.
Color correction of images can make your document more attractive and effective, and also eliminates the need to use other image enhancement programs. For example, Photoshop.
Artistic Effects in Word
Artistic effects provide interesting results. To stylize the picture, click on the ribbon Format – Change – Artistic effects. You can choose one of the effects in the gallery.
Compressing a picture
In large documents, every megabyte counts. If your document has hundreds of pages and a lot of images, it takes up a lot of disk space. It's difficult to email and post online.
To correct this situation, you can use image compression. To do this, click on the ribbon Format – Change – Compress pictures. In the window that opens, select the image resolution and compression options, following the program prompts.
Replacing a pattern
If it turns out that the inserted picture does not fit, replace it. To do this, click Format – Change – Change picture. A standard window for inserting a picture will open. Make your choice for replacement.
Reset pattern settings
To cancel all the settings that you made with the image in Word, click on the ribbon, click Format - Change - Restore picture.
Tabular method
I'll tell you right away. You won't be able to rotate regular text placed horizontally in an article on several pages. To do this, it must be in a separate block and the easiest way to do this is to place it in a table. Of course, you will need to have an idea of the structure of the document in advance, but this method is the simplest. In this case, the order of our actions is as follows:
- Go to the “Insert” tab and select “Table”. Here, depending on your needs, you can limit yourself to just one block or create an element from several rows and columns;
- In the desired cell, type the text or paste it by copying it from some source;
- Now select (mark) the text itself (not the cell) and select one of two options for flipping it. Either through the “Layout” > “Alignment” tab, or through the context menu (by clicking the right mouse button), we find the icon in the form of the letter “A” on the background of arrows and the corresponding “Rotate Text” function. We determine the required display method with a rotation of 90 degrees in any direction and voila... Done!
Now, by clicking on the table itself, you can drag it to the location you need, along with the text and other elements placed in it.
How to reverse text in Word - 5 ways
When designing a Word document, users wonder how to flip text in Word, for example, if you need to flip the text vertically, or at a certain angle. There are several ways to do this.
The word processor Word, included in the Microsoft Office suite of programs, has powerful functionality for document design in accordance with various requirements.
MS Word has a variety of functions for changing the arrangement of text in a document, including rotating text in different positions. The user only has to choose the most suitable option to complete the job.
We need to rotate the text in Word from its usual horizontal position to another position at a certain angle. For example, text must be positioned vertically in a document, or at a certain degree, or arbitrarily, as chosen by the user, with a different inclination from the horizontal.
In this article, you will find instructions on how to rotate text in Word in different ways: rotating text in a table or using a table, rotating text in a shape in different ways, rotating text in SmartArt graphics.
Method 3 – Inscription in the figure
Within a document, you can create separate canvases with shapes or blocks of text.
This block can be placed anywhere on the page. The text will be flipped at the desired angle.
Below is an example of working with blocks in MS Word :
- Open the document and in the upper area of the program click on the “Insert” tab;
- Select the Shapes field;
- Among the list of all elements, select the “Inscription” icon;
- Next, an empty block will appear on the page , inside which you need to type text. Using the editing tab, you can remove or adjust the borders of the shape, select the fill and shape;
- To rotate a figure, you need to left-click on the green circle area at the top of the text block . Hold down the key and rotate the element until the text appears the way you want;
This method is convenient for creating flowcharts, various brochure designs, preparing reports and other types of documents.
Reading backwards - an exercise for mastering speed reading skills
../../rus/back_words.html
Other online trainings for mastering speed reading skills
.
Reading words backwards is one of the exercises for mastering the skill of speed reading. Through it you learn to focus and introspect. Read the pages alternately - in normal mode and back to front. You can understand how to read backwards using the attached computer below.
Can you read backwards? It would seem like an empty idea to read words differently from how they are written. But that's not true. Testing is needed in order to understand how you understand the text you read, and then determine which part of your skill should be improved.
Read the text normally, then backwards. Watch how your reading speed changes
Practice until you achieve results, when it doesn’t matter what mode you are reading in
Look after yourself. Notice how he understands it
Understanding the reading process is very important. Only by analyzing yourself can you determine a program for your own development
Of course, the general principles of speeding up reading are suitable: - expanding the angle of view. reading silently, clearly setting a goal before reading. However, if you do not believe in your own strengths and do not analyze your successes and choose the best strategies, then general recommendations will not affect you.
The essence of training to master speed reading skills
The program trains attention. After training, reading regular text will be very easy
Catch the feeling of lightness that will arise after training. Create in your mind a feeling of lightness (which arose when switching from reading from right to left to the normal reading mode) and your reading speed will increase.
The benefits of reading text backwards
If a person knows how to concentrate on a task, he is able to perform a large amount of mental work without tremendous fatigue. Most people who are excellent at speed reading will strongly recommend that you mirror words and practice regularly. The point is simple - if a person concentrates sufficiently on the matter at hand (in our case, any textual material), it is easier for him to adequately and correctly perceive almost any amount of content. A lot of people give up reading books because they can’t grasp the essence of the plot when reading quickly. And if you read too slowly and constantly return to the previous page, all the pleasure from spending time with a book is lost. Working with text backwards, you yourself will not notice how quickly you develop concentration of thoughts. The text that seemed fantastically complex to you will seem elementary.
Let's summarize the effectiveness of this exercise:
- Your brain will quickly assimilate even complex sentences in large quantities;
- Reading books will turn into a complete pleasure;
- You can absorb a ton of pages in a short period of time;
- Reading text backwards aloud will improve your speech - it will become easier to say difficult words.
This exercise can be recommended even for children who are already fluent in reading in the usual way.
All you have to do is write the text mirror online in the appropriate column (or copy it from another source), after which the result will appear in the second small window. The “transfer” will be carried out instantly. Now you know how to mirror text and why users do it. It turns out that reading this way is far from just fun entertainment!
Source of the article: https://4txt.ru/perevernut-zerkalno
Bottom line
All methods for rotating text described in this article will work in any version of MS Word.
Only the location of the application tabs may differ
Please note that in order for the body and inverted text to look normal, you need to remove the line spacing between paragraphs and the table or between paragraphs and the figure
Otherwise, the space between these objects will be too noticeable.
If there is a formula among the text that needs to be reversed, you should only use the table method.
Often the block method does not work for complex multi-story formulas and special characters.
Thematic videos:
Word in table vertically
When creating a report in tabular form, where you should indicate a telephone number or insurance number, it is very often necessary to change the direction of the text, making it vertical. The following steps will sequentially lead to the desired result. So let's begin:
- Create a corresponding table based on the number of rows and columns – section “Insert” – “Table” and select the number of rows and columns.
- Point the mouse cursor at the place where the inscription will be located from top to bottom. Insert or type a word and go to the “Working with Tables” tab - “Layout”.
- Click on the “Text Direction” button and specify the desired alignment option. In our case, “Align text to the top right corner of the cell.”
It is possible that you don’t have to print the inscription, but immediately go to the next cell and click on “Direction...”, select the alignment and write the word from top to bottom.
This variation of writing numbers and phrases vertically will be relevant for versions of Microsoft Word 2007, 2010.